
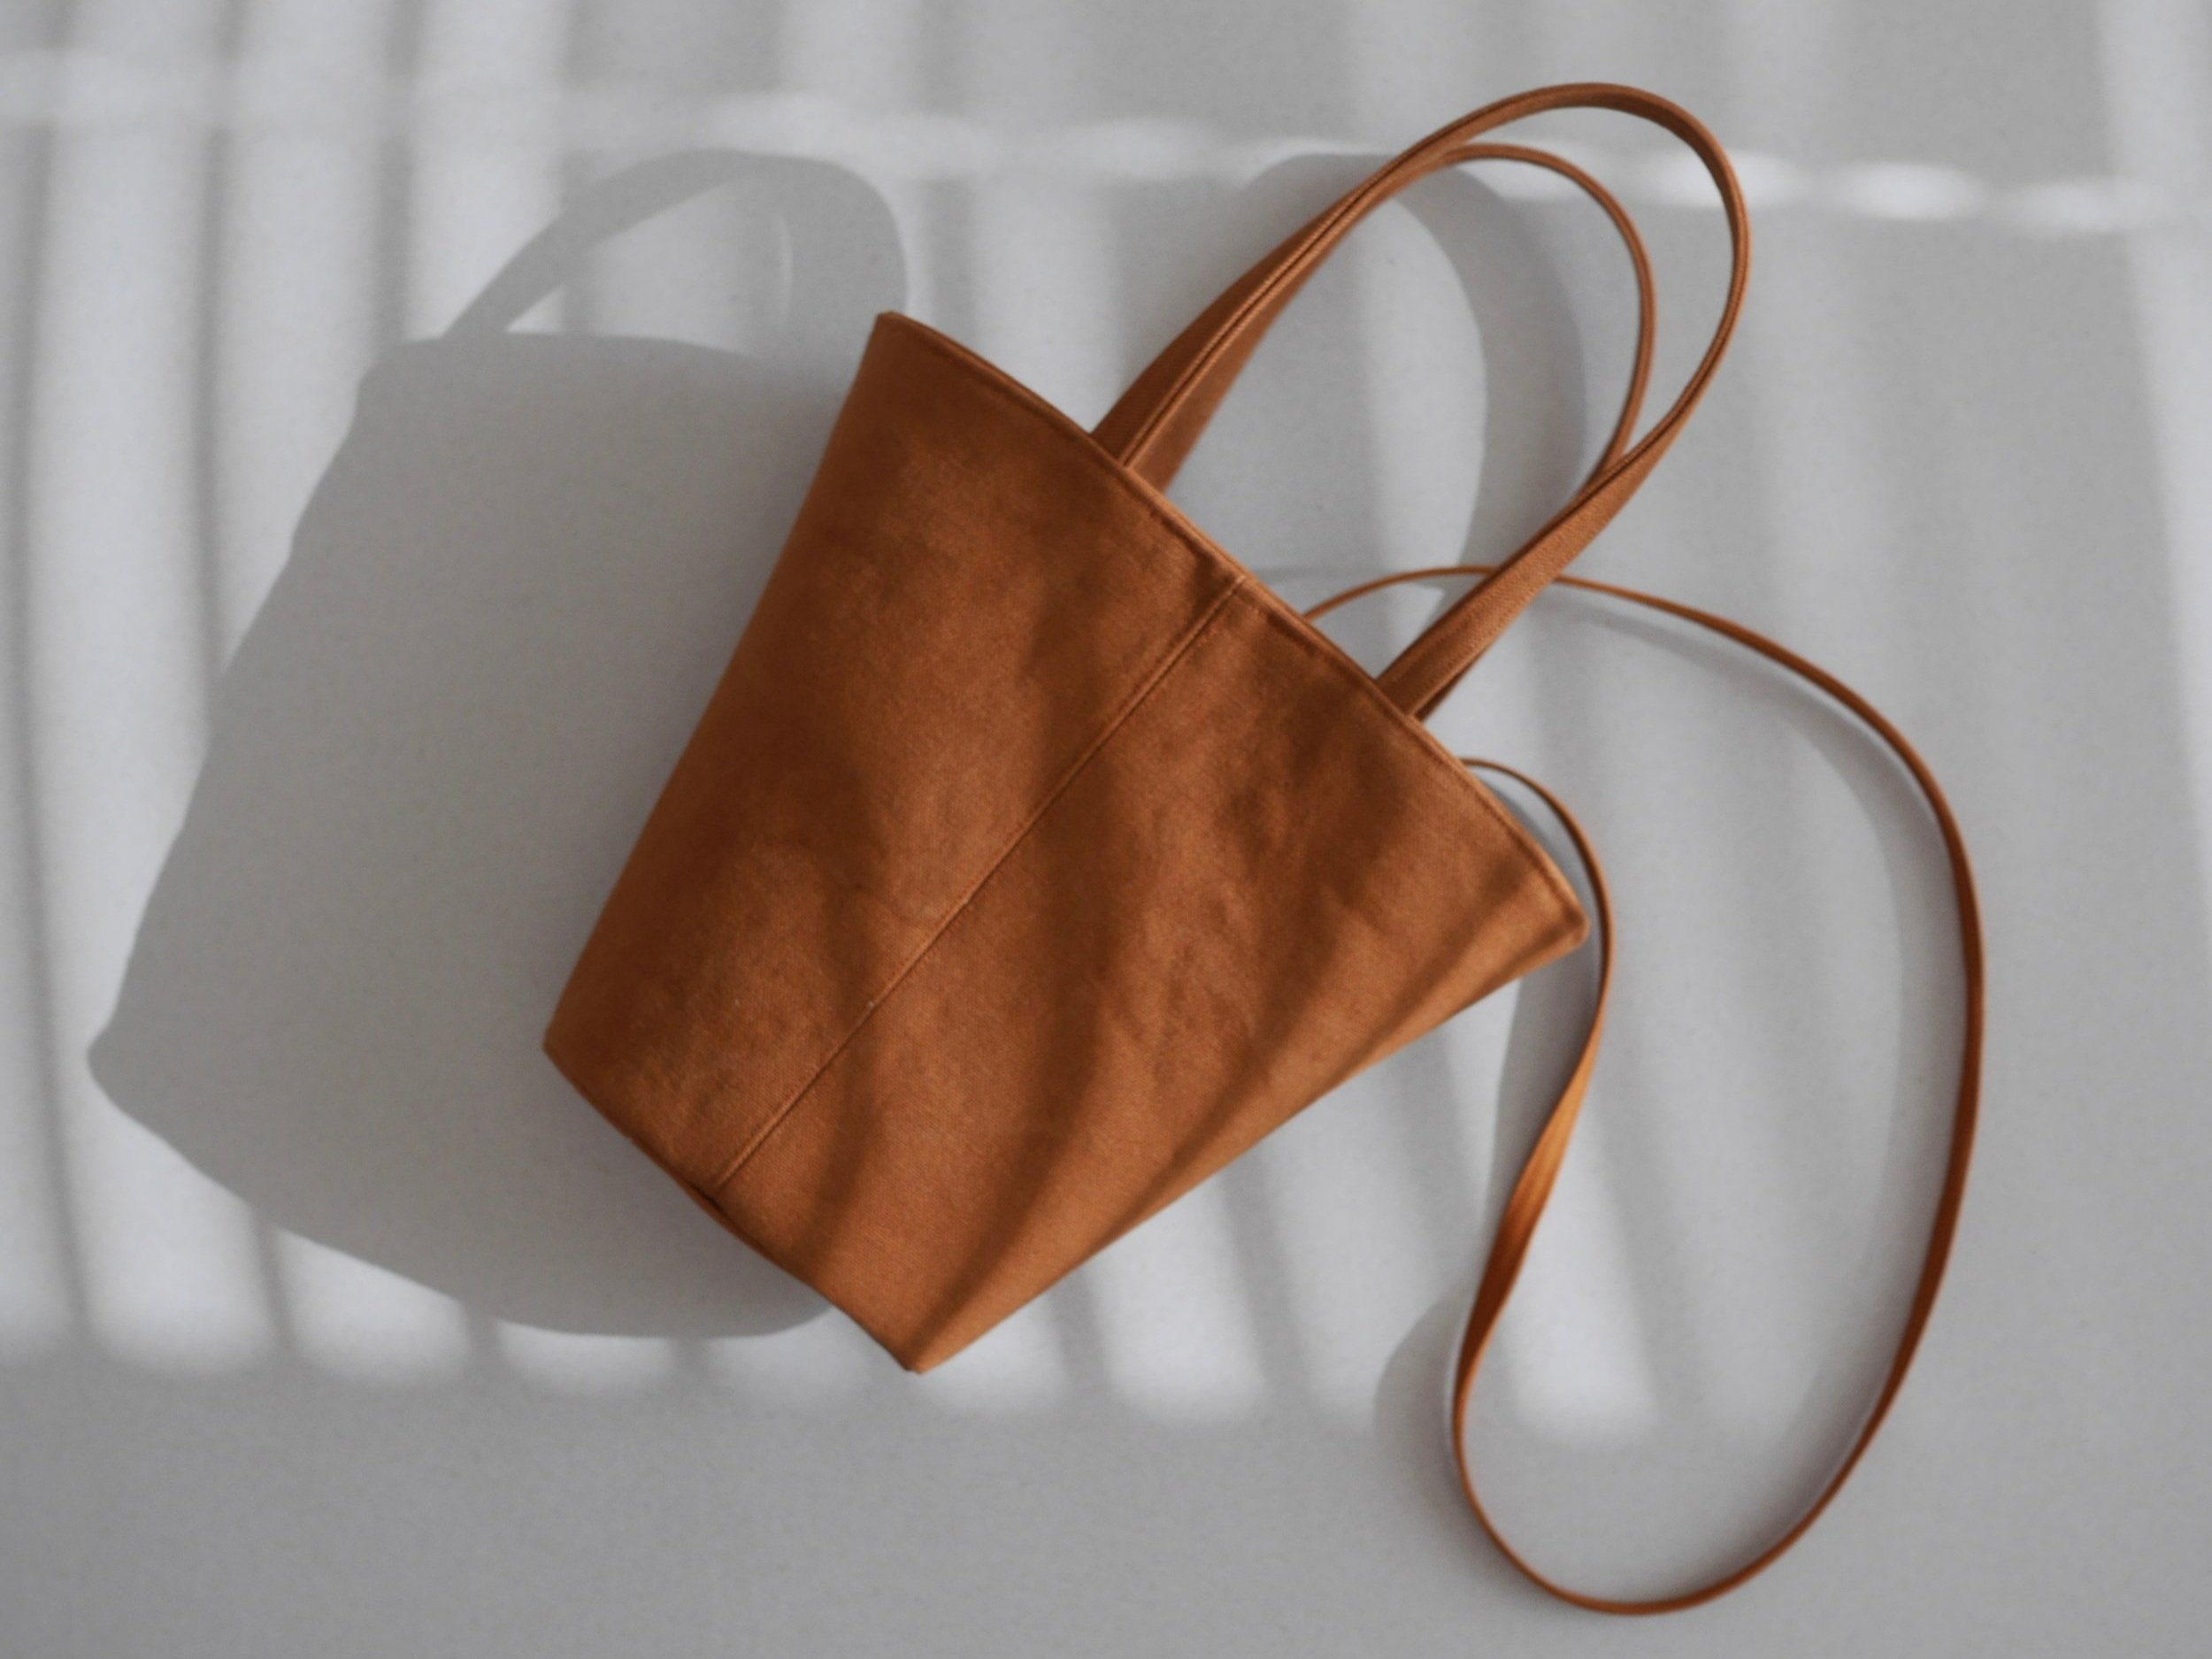
Half-scale ZWish
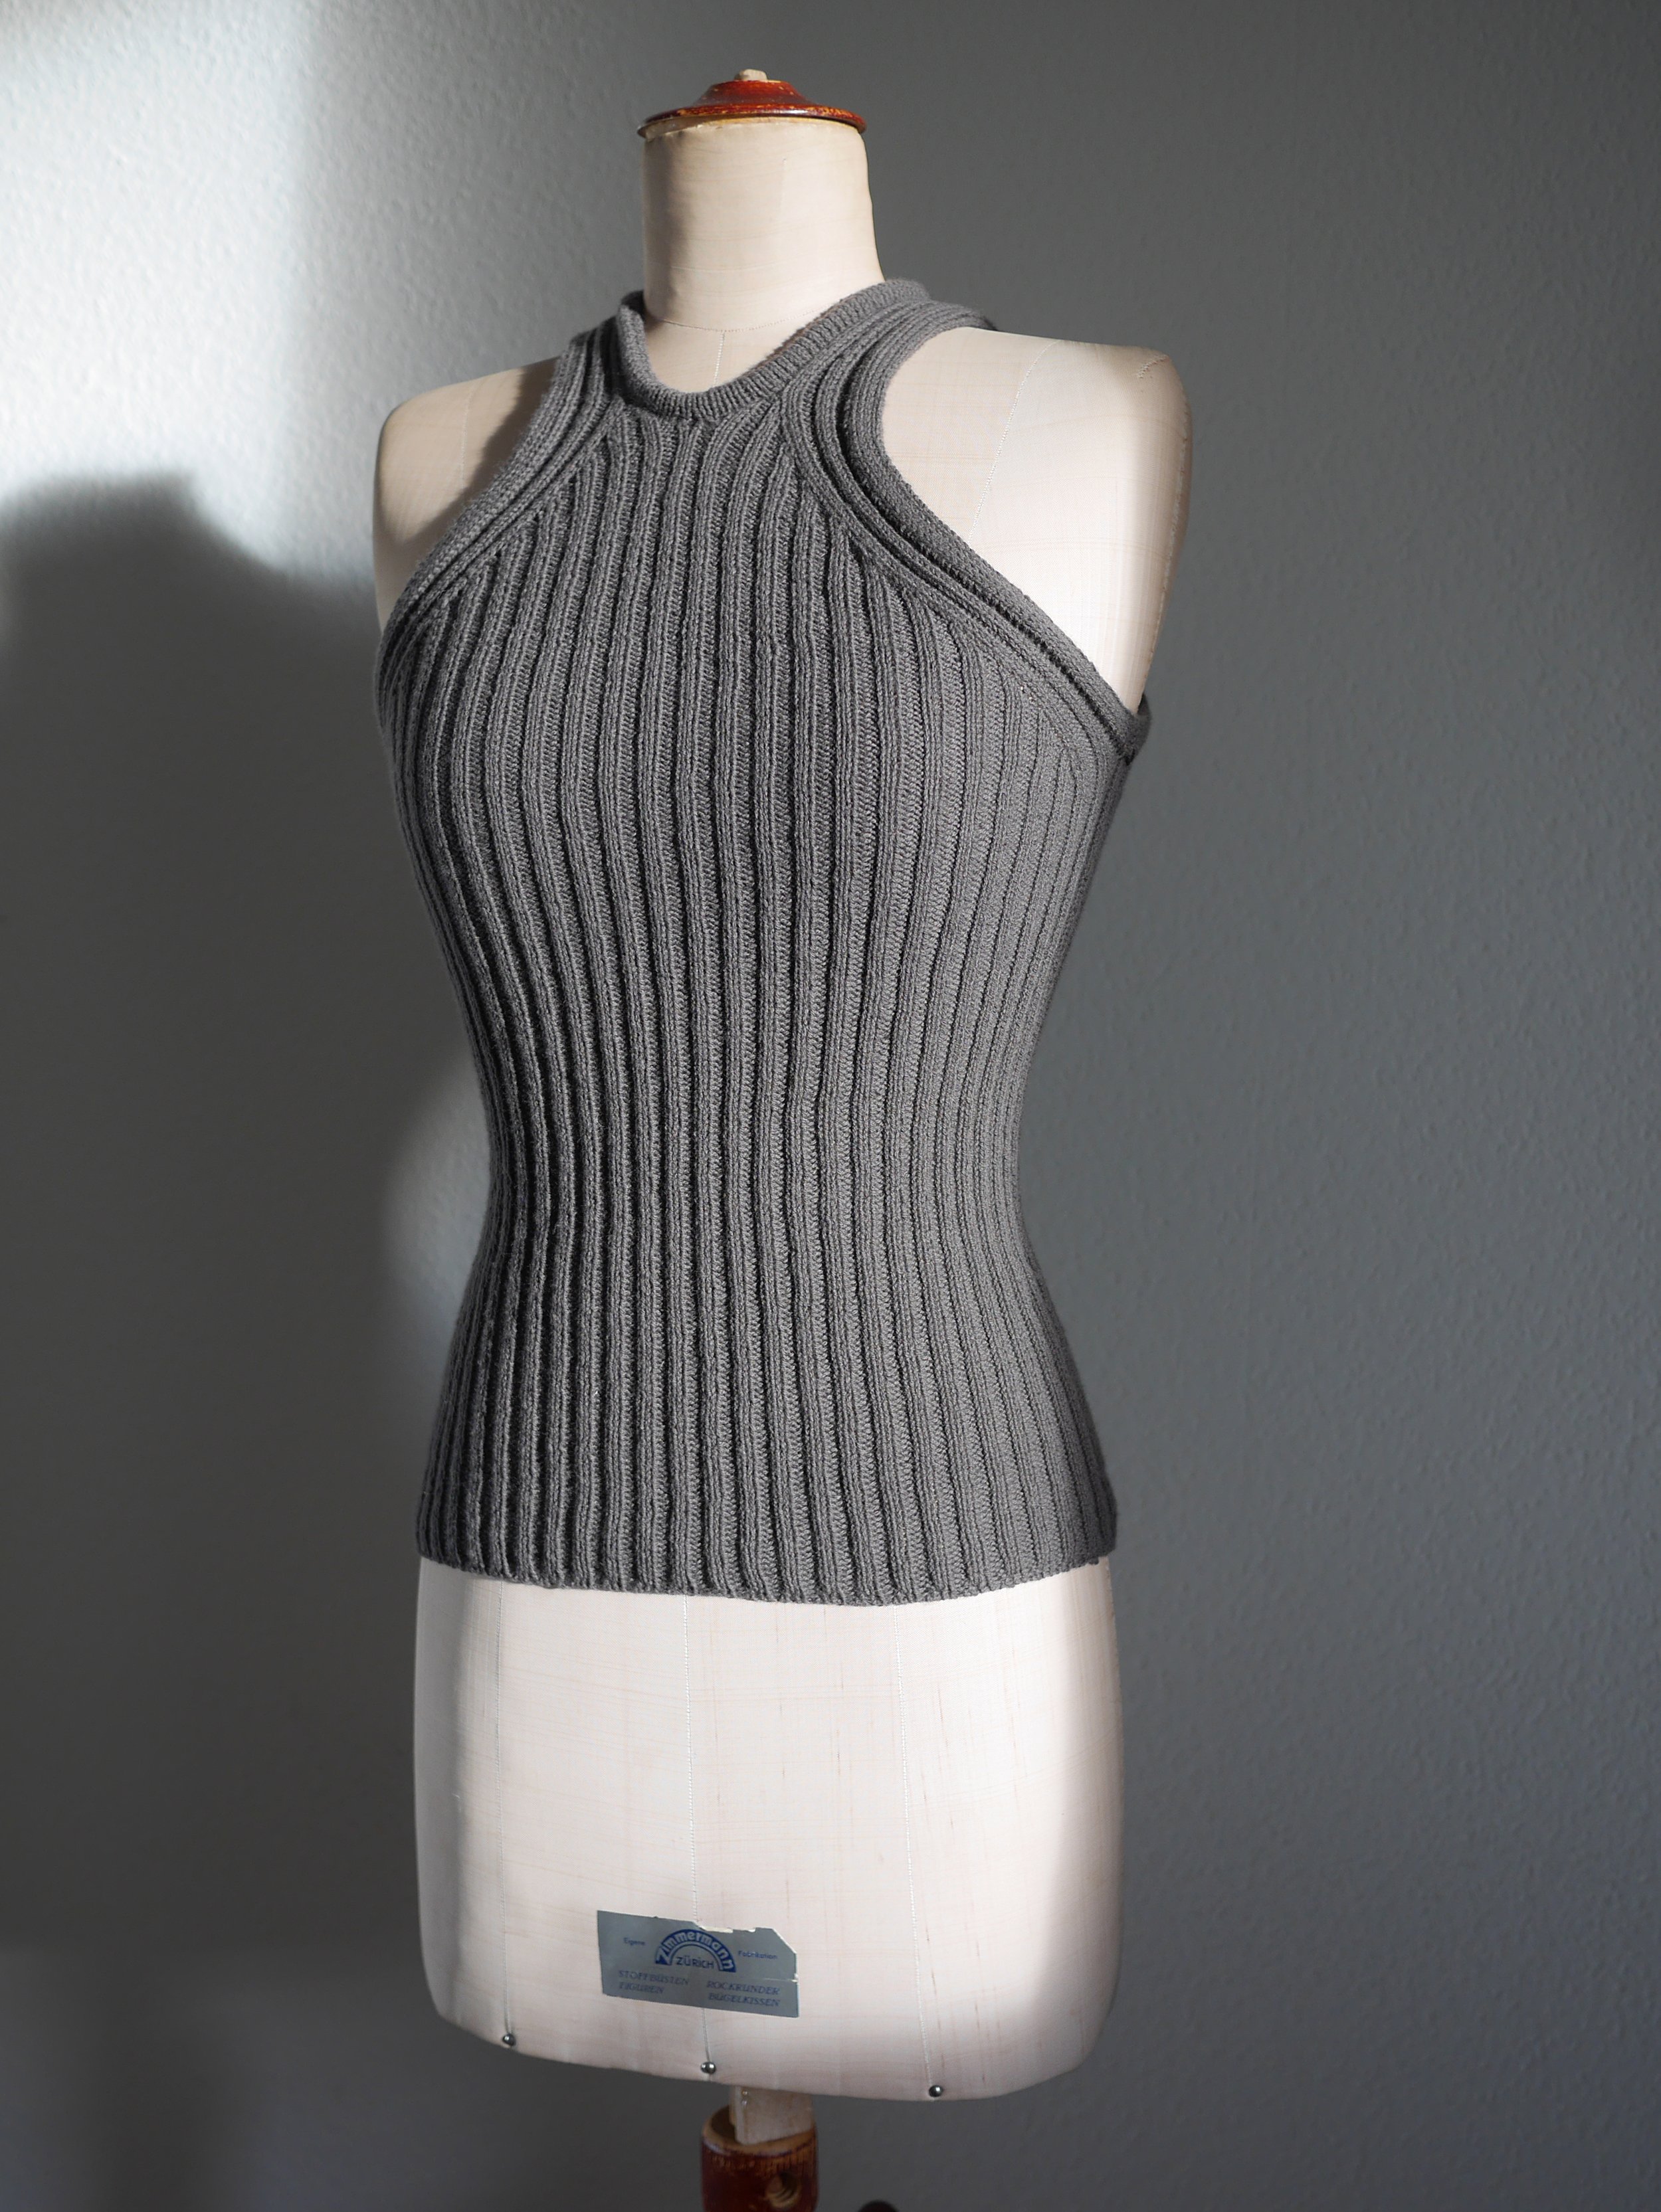
My latest bag is a result of three different modifications to the original #zwishtote pattern: it’s scaled down 50%, has an added facing, and has an added detachable long strap. For the sake of an easier read (fingers crossed!) I’ll explain each separately rather than conflate the three.
Part 1: How to scale down (or up)
Scaling the pattern is a surprisingly easy adjustment! It affects the fabric requirements, the cutting layout dimensions, the seam allowances, and the scale at which the one-page pattern is printed. Since I'm making a half-scale bag, 50% or 0.5 is my magic number:
Original fabric requirements x 0.5 → New fabric requirements
Original cutting layout dimensions x 0.5 → New cutting layout dimensions
Original seam allowance (3/8” or 1cm) x 0.5 → New SA (3/16” or 0.5cm)
Original pattern pieces (print at 100%) x 0.5 → Print at 50%
Sewing instructions → Remain the same!
A 75%, 125%, or even 150% scale version would work well too! I don’t recommend going smaller than 50% since the seam allowances become too small. Before finalizing the modified cutting layout and cutting the fabric, I considering how the modified bag will fit. The original straps are ~25” (65cm) long and designed to fit over-the-shoulder. A half-scale version will have straps half as wide and half as long; perfect for a cute hand-held bag. (Conversely, a scaled-up version will have wider and longer straps than the original, so shortening the straps may be appropriate to ensure the bag doesn’t hang too low when worn!) I wanted a half-scale cutie that could still be a shoulder or crossbody bag so I considered:
Keeping the straps half as wide—slender and proportionate to the bag—but lengthening them so they’re at least as long as the pattern’s original or
Keeping the half-scale straps and adding an additional long strap.
I ultimately decided on the latter option. Part 3 will go into detail about this additional strap. This adjustment (and probably any strap length adjustment) will mean deviating from a zero/zero-ish waste pattern layout, but that’s A-OK in my book, especially if it means the bag will get more wear!

Changing the scale of the bag didn’t affect any of the sewing instructions; other than adjusting the seam allowances or any dimensioned instructions. I ended up handstitching the bottom, oval piece to the bag (steps 6-7…tedious, I know) since the pieces were too small to maneuver through my machine. For the same reason, I chose to omit the topstitching on the two side seams (step 3-4) but I could have handstitched these too if I was in the mood for extra tedium (I was not).

P.S. I’m using 475gsm canvas self fabric—it’s the best—and 210 gsm lining fabric. Plus, two karabiners, two 16mm diameter d-rings, and a 14.5mm diameter magnetic closure.
Part 2 — Adding a Facing
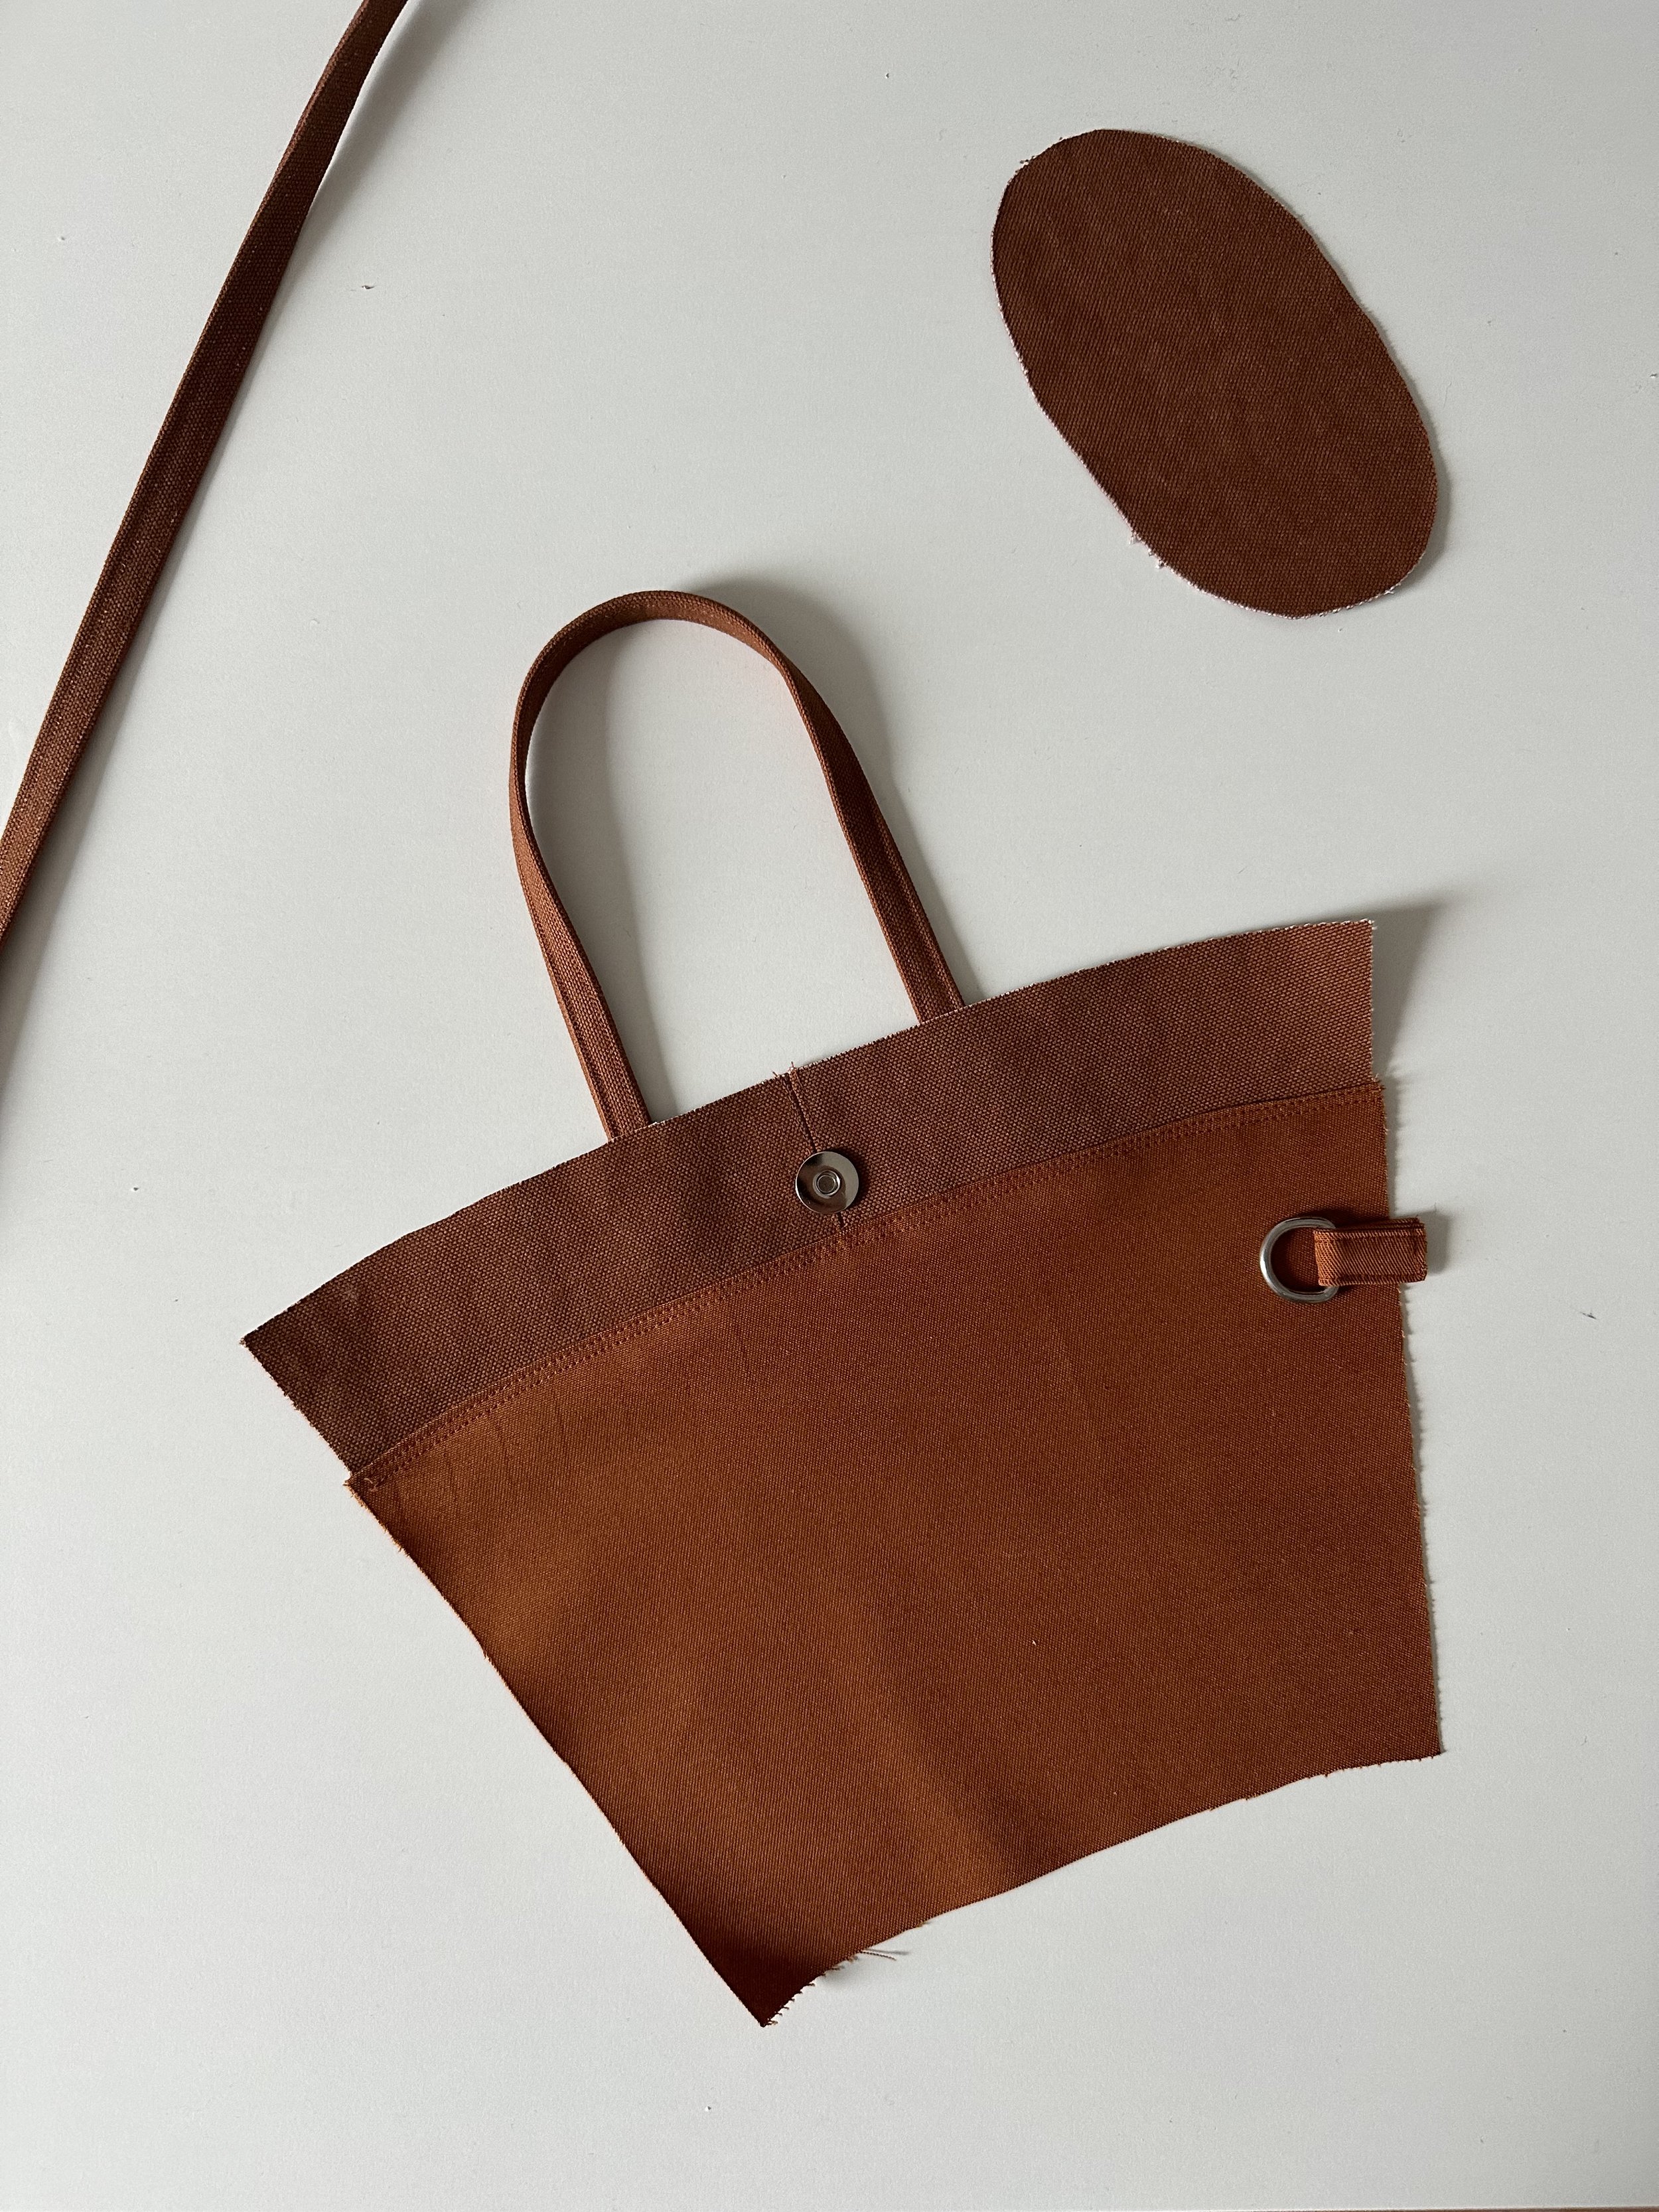
An interior facing gives an extra professional detail to the bag. Since the facing is in the bag’s self fabric, adding one ensures the lining fabric is concealed from the outside. This is helpful if your lining fabric is very distinct from your lining fabric. I drew the half-scale cutting layouts of the self and lining fabric onto paper and determined that the facing should be 1 ¾” (4.5cm) deep (or 3 ½” / 9cm for the original) so the magnetic closure is centered. I drew this measurement, plus a ⅜” (1cm) seam allowance down from the top of each bag piece. These pieces will be the facings. I then drew this measurement again, minus a ⅜” (1cm) seam allowance down from the top of each lining piece. These pieces will be the new, shorter lining. This ¾” (2cm) overlap is necessary since this will become the seam between the facing and the lining. I put the facing and lining pieces away until finishing step 13 of the pattern. Then, I sewed the four facing pieces into two (at the CF & CB) and topstitched on either side of the seam—essentially step 13 & 15 of the pattern but with modified seam allowances. I also then topstitched the CB seam of the lining piece (H/J). Then, I sewed the top of each lining piece to the bottom of each facing piece, pressed the seam allowance down to the bottom, and did a double topstitch. I skipped ahead to step 21 and attached the magnetic closure to each piece. I placed it right above/as close as I could to the facing/lining seam. All other sewing steps remain unaffected unless adding a detachable strap, explained below.

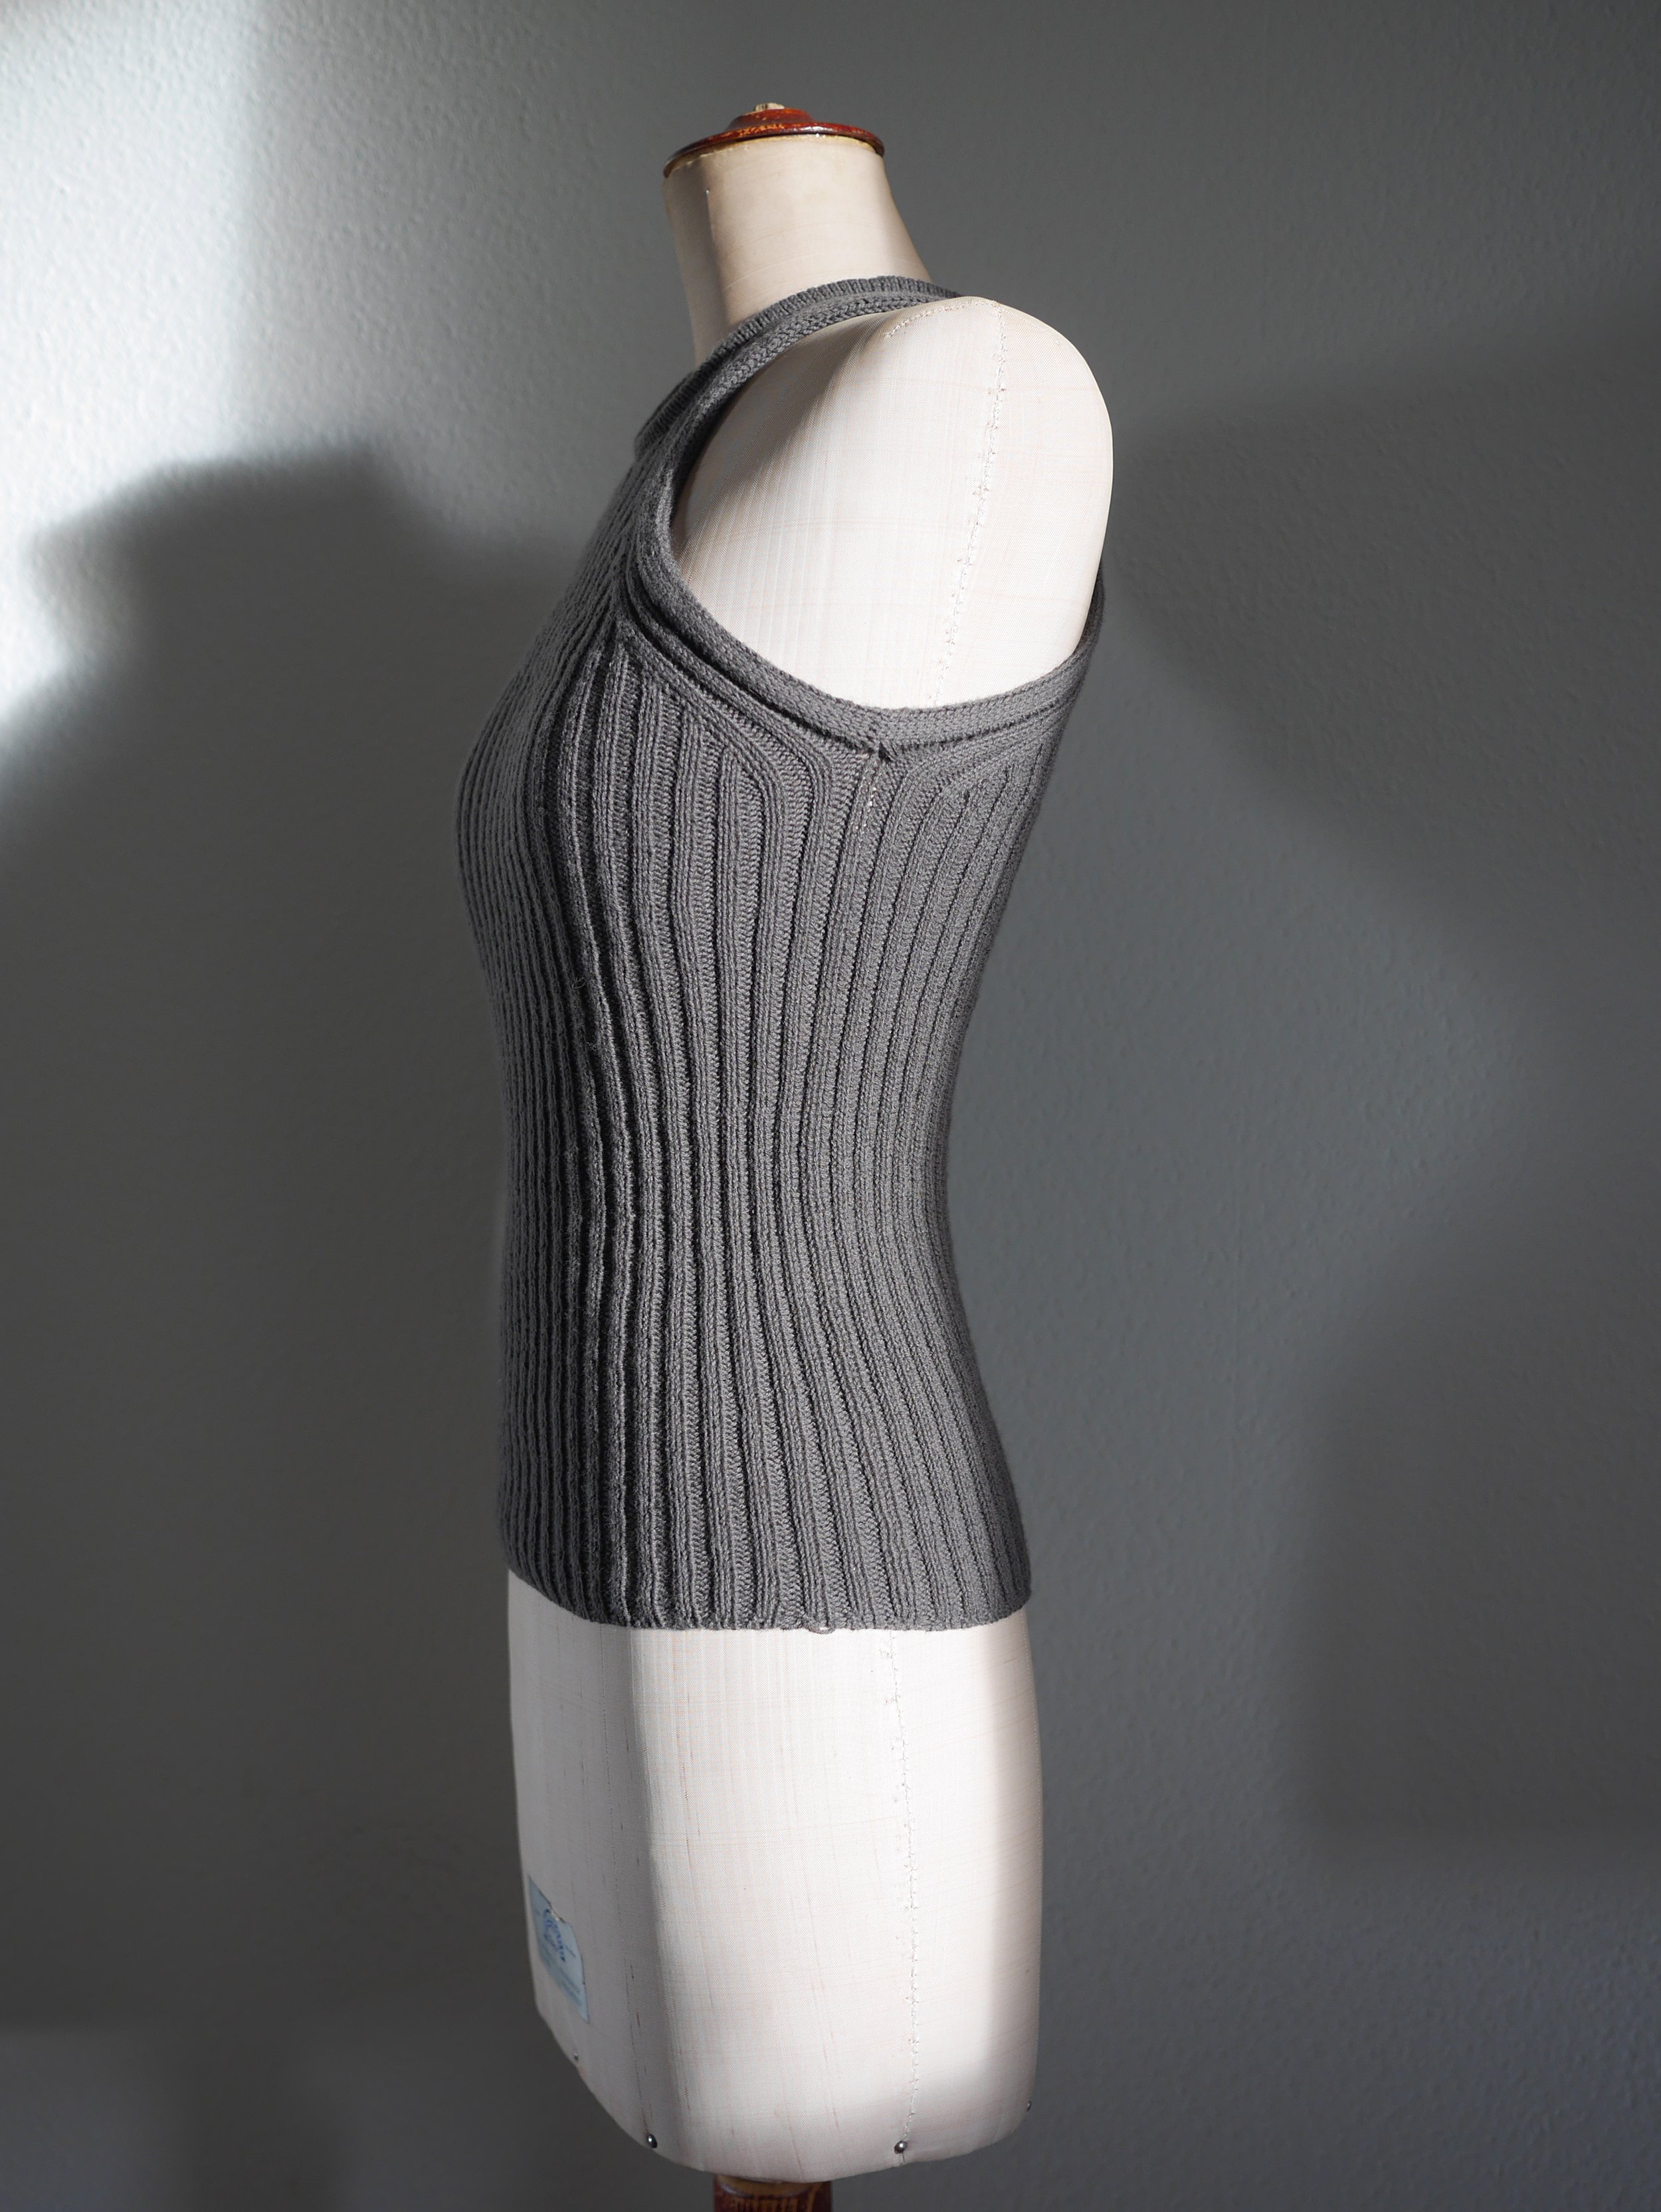
Part 3 - Adding a Detachable Strap
An additional strap is a useful modification if you’re scaling the bag pattern down, and want to have the option of still wearing it over-the-shoulder or cross-body. The original zwish bag pattern has an optional interior key ring, which is integrated into the bag’s interior side seam. For this modification, I essentially doubled this detail so the long strap has these two rings to clip into.

I used a soft measuring tape and decided that the perfect crossbody strap length would be on ~45” (114cm). The strap clips into the bag below the top hem, so this measurement factored that in by adding a tiny bit of length. The full length of my lining fabric was 47” (120cm) so it was perfect to become the strap plus the two ring loop pieces at 1 ⅛” (3cm) long each. I cut a 1 ½” (4cm) strip from the full length and then sewed the long strap as step 8 instructed. Then, I cut the two loop pieces from it. (If your fabric piece isn’t long enough, cut and sew the three pieces separately.)
I placed the long strap aside and followed the pattern’s original instructions for key ring “M” at step 10 to make the strap loop pieces into loop with their respective rings. (Keep in mind these loop pieces are much shorter than “M” in the diagrams—they’re only about ⅜” (1cm) long once sewn in.) For step 12, I baste stitched them both to lining piece “I”. I also adjusted their placement a bit, ignoring the pattern’s measurement and rather placing them just below the seam between the facing and the lining. The first loop is secured to the bag as instructed in step 14. The second one (not pictured) will be sewn in step 16. The gap had to shift down to do this: it wasn’t centered but a few centimeters shy from the bottom seam.
All remaining sewing steps are unaffected by the modifications! Just the long strap needs finishing: I added a zig-zag stitch (~width 4, length 1) to the two short edges, then pressed each edge up ½” (1.5cm). This folding is where the karabiners go, and after sliding those on, I refolded and secured each end with a box stitch. I then clipped each karabiner onto the interior rings because I was in a crossbody mood! Otherwise, I would have rolled the strap up and put it in the little zwish pocket. Because I have options!


Learning to Knit

One and half years is a long time to be working towards something. When someone tells you, “finally after one and a half years, I…” you might expect the sentence to end with something along the lines of “ran the NYC marathon” or “finished my novel”. You probably don’t expect an “I knit a tank top” confession, but that’s what this is!
To be fair, it’s not like I was knitting continuously for 18 months straight. Far from it. There were long breaks during work deadlines and nine months of pregnancy. And it’s not just any tank top. It’s the Camisole No.5 by My Favourite Things Knitwear, which I later learned is ranked a 4 out of 5 in terms of difficulty. Anyways, I liked the design so much that it single-handedly convinced me—someone who had never knit so much as a scarf—to start knitting.
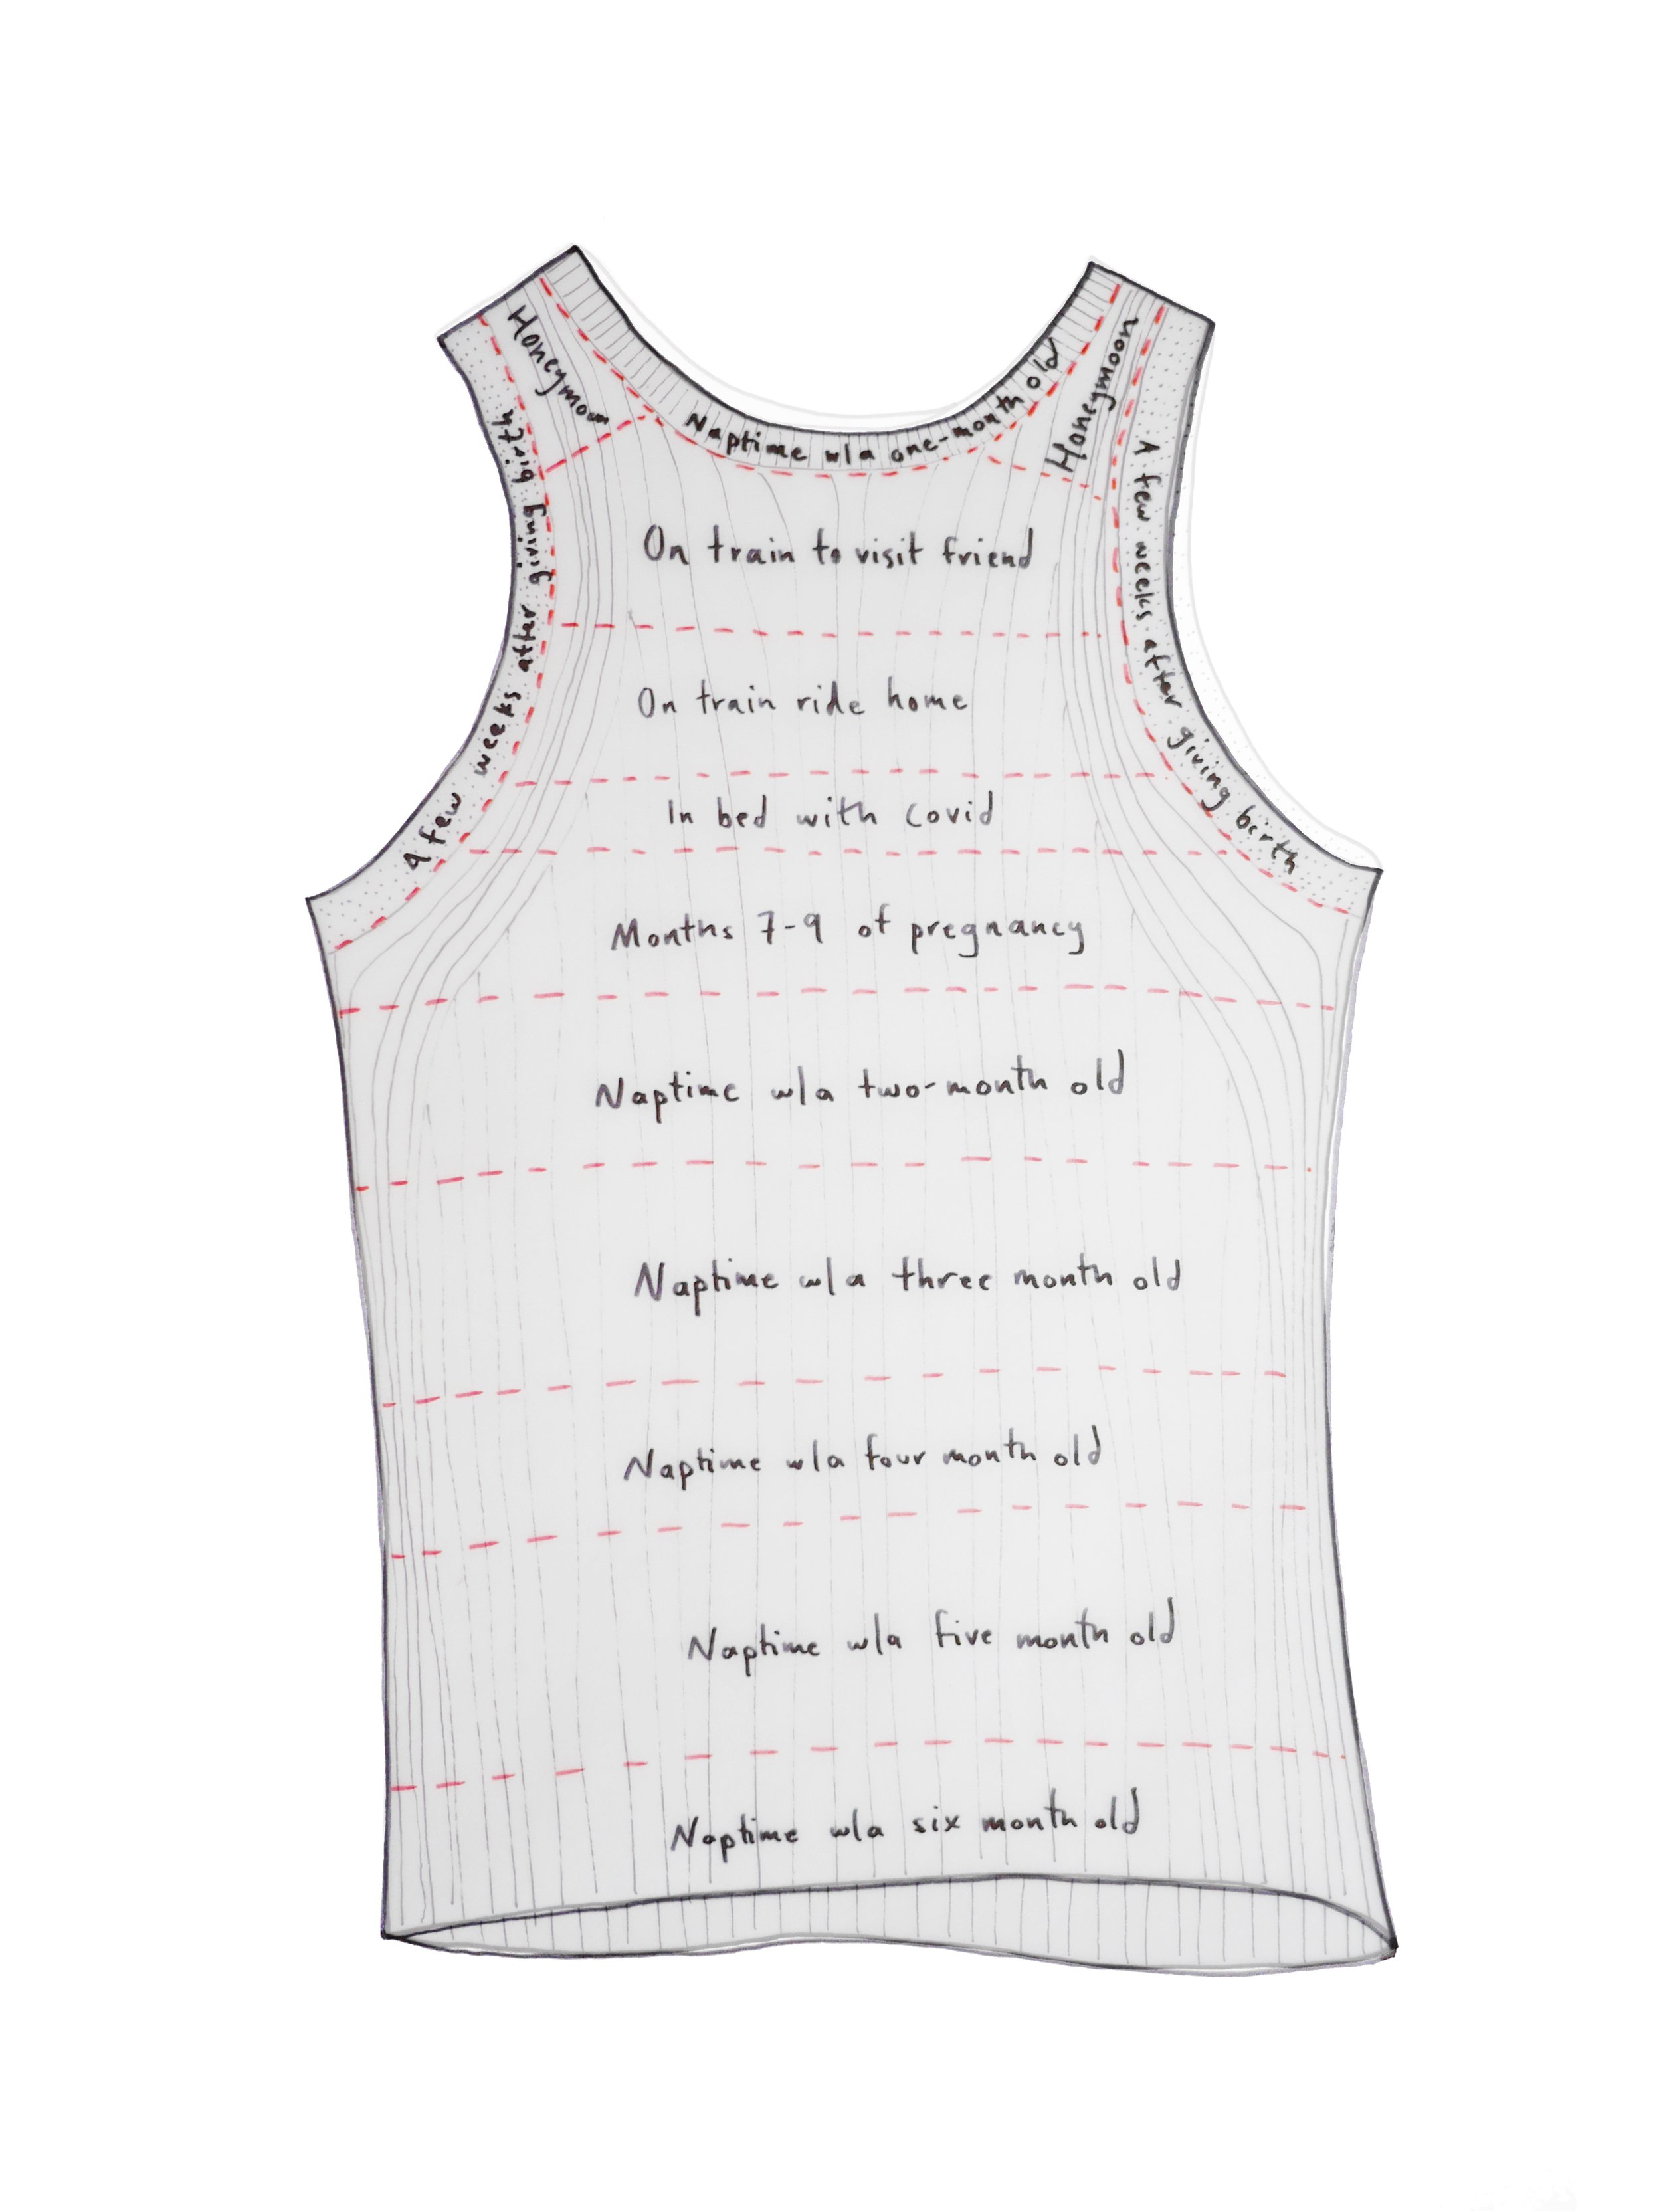
Unlike sewing projects, which generally are confined to a dedicated space and take less time, I’m surprised by how much knitting projects feel like companions. They come with you on holidays, into doctor office waiting rooms, and into bed when you’re sick or tired. Every part of this camisole has a memory attached to it. The left strap was knit on our honeymoon, up in a mountain hut. There was no wifi and limited service, which was lovely aside from me still craving Knitting 101 YouTube videos for reassurance. A good portion of the neckline was knit on my way to and from meeting one of my best friends in Paris. The return train was more than two hours late due to hitting a wolf and I may have been the only non-grumpy passenger because that equated to about 10 extra rows. The endless body in 2x2 ribbing was done entirely doing contact naps with my now six month old daughter.


If you asked me a year ago if I enjoy knitting, I would have probably said no. The romantic image I had of knitting might stem from “Goodnight Moon”, which I’m now re-reading some 30 years later. The mother rabbit’s presence is attentive but not overly so: she sits nearby the child in a rocking chair, knitting in dim lighting. I’m far from finding knitting meditative. I still need to chant “knit, knit, purl, purl” in my head while I do the ribbing, so we have an unspoken house rule that knitting and talking don’t mix. But I hope that will change with practice. If you asked me today if I enjoy knitting, I think I would say yes.
Below are some videos that I found helpful, if not necessary, should you make your own Cami! I’m going to skip basic videos like “how to knit”, “how to purl”, “how to cast on”, etc. because I assume you’re less green than I am (but if you’re a total beginner, you got this!)

LINKS
I found troubleshooting mistakes super complicated in ribbing, so lifelines are there to help you easily frog back to a row and start over. I added one about every 15 rows at the beginning which felt like a security blanket. https://youtu.be/crn5FRx5_74
The double knitted edges were tricky for me to work out from the instructions alone. This video helped, albeit not in English: https://youtu.be/MpMOz47w9vk
She has a separate video (this one with English CCs) demonstrating grafting the edge at the end: https://youtu.be/MpMOz47w9vk
Tubular bind-off is important for the neckline so it remains stretchy: https://youtu.be/0jPMLIE7ac8
I also used the tubular bind-off for the body at the waist, which required converting 2x2 ribbing to 1x1 ribbing for one row: https://youtu.be/YCY_2oxi_vA
Weaving in ends! https://youtu.be/ohtv2fyd_lY
P.S. The construction of the camisole has the armhole and neck hole edges as the last steps. I put the body on hold once the front and back were connected and instead, got those tricky edges out of the way, and saved the meditative 2x2 body for last. I recommend this! It also meant I wasn’t worried about running out of yarn, because if I did, it would have just meant a slightly shorter crop. Speaking of which, I made the body 6cm longer than the pattern recommended since I didn’t want a crop at all, and plan to wear it tucked in.
P.P.S. I knit a size Small, and used almost exactly three balls of “dark moose” merino yarn from Knitting for Olive.
Adding Structure to a Bag
The idea for #zwwwave2 came during a sleepless night in June. (To my fellow insomniac sewists: forget counting sheep and try visualizing cutting layouts!) Three months and eight samples later, the design remains relatively unchanged from the original paper prototype, but the challenge has been ensuring that the bag was structural and held its shape. I wanted it to behave like a little leather envelope bag, but made of fabric, so I felt that if the bag was flimsy the success of the design would collapse alongside it.


There are two main methods for creating structure in bags. The first is using a material that is strong enough to function as both the bag’s expression and its structure. A perfect (and perhaps extreme) example of this is the L.L.Bean tote made out of 24oz canvas. I'm pretty sure it would remain upright in 100 mile-per-hour winds. Unfortunately, #zwwave2 has curves and sharp corners that would be impossible to achieve in a heavy-weight fabric. Plus, sourcing a 24oz canvas seems almost as hard as sewing with it. The second method is expressing one material and relying on another hidden layer to provide structure. Playing surgeon on several vintage designer bags has taught me that this method is widespread in bag-making, especially when the bag is constructed from leather. Watch this video to see how leather hides are often split open to laminate a plastic or cardboard interlayer to give it more structure! Similarly, quilted bags like a Vera Bradley, use a foam stabilizer to stiffen otherwise flimsy, outer cotton layers, not unlike putting batting inside a quilt or coat. It’s all a bit dishonest, but satisfying, isn’t it? With little previous knowledge about what’s available, I pursued many options for interlayers and this is what I learned.

This is an overview of the different types of interlinings you may encounter, based on my experience.
INTERFACINGS
Most sewists will be familiar with interfacings: they are a type of fabric interlayer usually fused to the wrong side of fabric to reinforce, stabilize, and stiffen it. It’s for this reason that the #zwwave2 pattern calls for interfacing only if the fabric you've chosen to use is a lighter weight than recommended. A somewhat light and limp canvas, for example, once interfaced, should behave similarly to an oilskin or waxed canvas (the recommended fabrics) which are both intrinsically stiff and structural.
STABILIZERS
A stabilizer is similar in principle to an interfacing but it’s not a fabric, but rather another material designed to give structure to fabric, either temporarily or permanently. (I won’t get into this whole other subset of temporary stabilizers that are cut-away, wash-away, heat-away, etc.!) Like interfacings, bag-making stabilizers are available as either fusible and sew-in, and they’re generally heavier and thicker, and therefore less prevalent in garment sewing.

#ZWWAVE2 SAMPLES
My first three bag samples used various forms of plastic and chipboard. The plastic gave the bag a brittle feeling like the brim of a baseball cap, which is apparently what this product is designed for. Chipboard, or thick and dense cardboard, worked moderately well except for a resilience factor: I worried that the force of opening the front flap repeatedly would create a permanent fold/crease at the magnet. Both were successful in creating structure but I suspect they’d benefit from being laminated between a more durable material like leather.
I will say that while it’s possible to get away with not trimming the seam allowance away when working with interfacings, it’s super important to do so with these stabilizers, otherwise the edges and corners will be either extra bulky or just impossible!
For my next two bag samples, I used a 8.25oz/280 gsm cotton canvas that I double interfaced. This was an experiment to see the results of omitting a stabilizer. The result wasn’t bad by any means but certainly lacked the “I can’t believe it’s not leather” effect I had been going for.


Last but not least, I tried a foam stabilizer for my last two samples. My local sewing store happens to stock byAnnie’s “Soft but Stable”, which was developed specifically for bag-making and lives up to its name. It provides structure without being stiff and it makes opening the front magnetized flap just feel good! It worked perfectly with oilskin but it felt a little more foamy or “crafty” with a thin wool.
“Soft but Stable” can be elusive so my pattern testers have helped me identify alternatives, outlined below. I’ve also assembled a limited quantity of kits which include a zwwave2 portion-sized piece of foam stabilizer, as well as the magnets and ring hardware. They will be available in my shop upon the release of the sewing pattern.
Although I ultimately recommend using a foam stabilizer and following the pattern’s fabric recommendations for the best results, the spirit of this bag is to be as zero / minimal waste as possible. If that means using whatever fabric scraps you have on hand, please do so! If that means sourcing a stabilizer that’s locally available to you, or improvising—one tester used felted wool and another, an old yoga mat, both to great success—do that too!


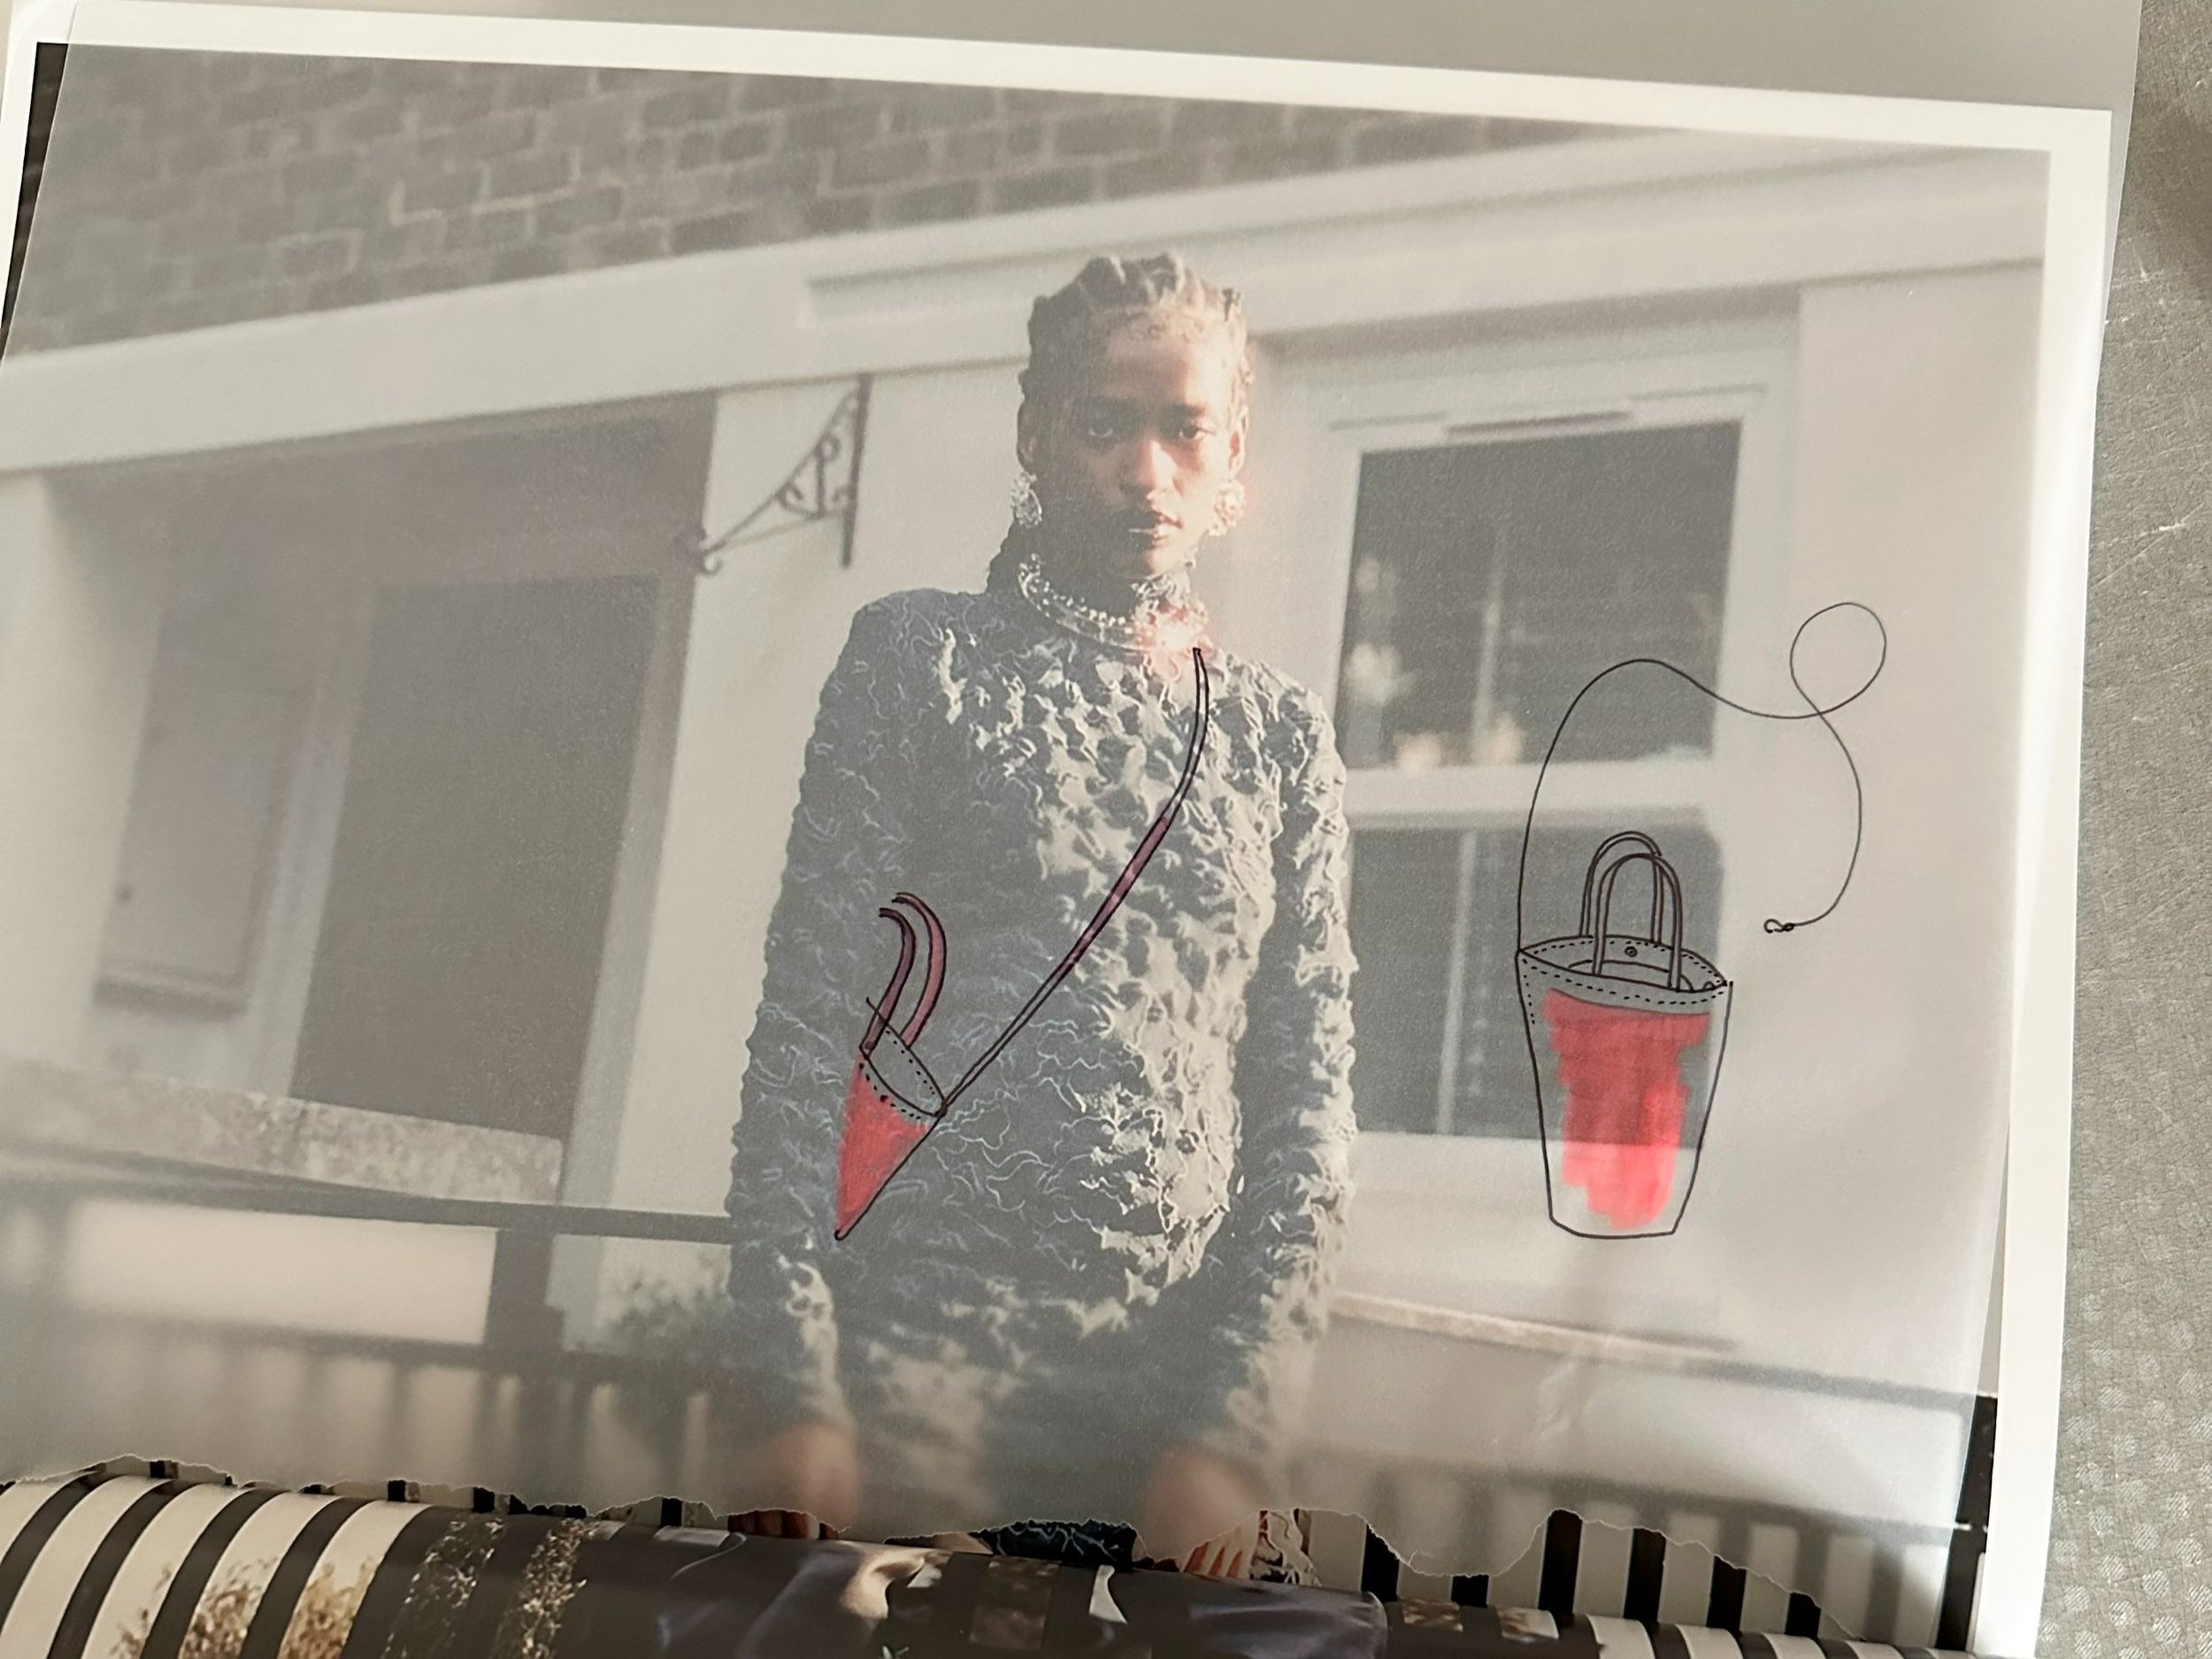
#mmFlorence hack
I used the news of my pregnancy as an excuse to search for sewing patterns through a new lens. Could I wear this throughout all nine months of pregnancy? Will it be good for breastfeeding? Do I like the design enough to wear it post-pregnancy? Could it be easily modified to fit any of these previous prerequisites? These were the questions I was asking myself, and at some point (probably in a few months when time grants me the credibility to be able to comprehensively answer) I will write an additional blog post listing all the maternity-friendly patterns I’ve found that personally fit the bill.
Anyways, one of the first patterns that caught my eye was The Florence by Merchant & Mills. My excitement to sew it can probably be best explained by the fact that I found out I was pregnant on Christmas Eve and I ordered the paper pattern, as well as the required 1.3 meters of fabric and three buttons, on New Year’s Day. If you don’t count the pregnancy test, you could argue it was my first baby-related purchase. I will say that before having bump-bias, I was never drawn to peplum tops, but body changes have prompted many new preferences!
MM’s description of Florence is “a sweet swingy top with a button back detail and soft high low gathers”. From the very beginning, I was hoping to successfully modify the pattern to be more maternity friendly, meaning “flipping” the high-low seam so that the high gathers (and button placket) are in the front, and low gathers are in the back. Inspiration for this modified version must be given to Rudy Jude’s since-sold-out Day Blouse. There are several versions under the #mmFlorence hashtag that more literally emulate the Day Blouse e.g. puff sleeves, straightened gathered hem, etc. but I wanted to keep the simple cap sleeves and the high-low curve, so if interested, here’s a behind-the-scenes of how I got there.


In hopes of clearly conveying my modifications without using photos of the actual pattern out of respect to Merchant & Mills, I’ve included a very-not-to-scale sketch below. The pattern pieces drawn in black are the original. Red pen indicates when I traced piece 2 “Back” and blue pen indicates when I traced piece 1 “Front” in order to make the two modified Front & Back pieces.

To elaborate on the sketch, here are the modifications written out. Keep in mind that I made this in a size 10, so while the steps should be the same across sizes the measurements I list may vary.
Front (New): trace the neckline, shoulder seam, armescye, and side seam of the original front including any accompanying marks from the original Front piece. Then, trace the bottom gather seam line from the original back piece matching its low point to the bottom of the side seam. The curve’s high point comes up about 17cm higher than the original. Then, trace the bottom placket from the original back piece, matching what used to be center back to center front. Lastly, make sure to cut 2 (1 pair) of the new front piece; it’s no longer cut on fold.
Back (New): trace the neckline, shoulder seam, armescye, and side seam of the original front including any accompanying marks including the dart from the original Back piece. Then, trace the bottom gather seam like from the original Front piece matching its high point to the bottom of the side seam. Extend the new Center Back line ~17cm to meet the low point of the new bottom seam. Cut on the fold.
Sleeve: unchanged.
Front Panel: this piece pairs with the low gather, so it remains unchanged from the pattern other than becoming the Back Panel.
Back Panel: this piece pairs with the high gather, so it remains unchanged from the pattern other than becoming the Front Panel. I did however lengthen this pattern piece by 7cm before cutting the fabric since I wanted to make sure it had enough coverage for my bump. I then had to blend the two panel lengths at the side seams, shown kind of abstractly in the sketch with dashed lines. I did this after trying the shirt on and before hemming the bottom.
Neck Binding: unchanged.
The shirt construction was otherwise the same: just stay on your toes when reading the instructions to substitute “back” for “front” and vice versa! And I imagine you could follow the same steps to “hack” the #mmFlorence dress view too, since the only difference lies in the length of pieces 4 and 5. Looking forward to seeing your own versions!!


Simple Pillow Cases from Fabric Scraps
In late spring, I made two dresses (the Duplantier & Smultron), which left me with a decent amount of scrap linen and seersucker fabric, respectively. Since most of my projects are zero waste, sizable scraps are a rare occurrence, but I decided to put them to good use as pillow cases. (Decorative pillows are also a rare occurrence in my apartment—and by rare, I mean non-existent—but I’ve been spending a lot of my free time in bed lately, wanting to be propped up and surrounded by things that make me smile.) Also, I should add, that I fell quite deeply in love with this Cawley Studio pillow.
I ended up making two cases: one simple and the other quilted and I’ll walk you through how I made both. If you’re considering which one to make, I’ll tell you, the simple case is as advertised: simple! I could cut, sew, and test-drive the pillow in a catnap all in under an hour. The quilted case has the same case construction but requires some extra pre-work e.g. measuring, cutting, and sewing the patchwork squares which will tack on an extra couple of hours.


MEASURE & CUT FABRIC
To figure out how much fabric you’ll need, take the pillow you’re planning on covering and measure its length and width from seam to seam, using a soft tape measure. For reference, my pillows are 43cm x 43cm.
For the simple cover:
Cut three fabric pieces as follows.
- Front Piece, (pillow width + 2cm*) by (pillow length + 2cm*)
- Back Pieces (2), (pillow width x 2/3 + 2cm*) by (pillow length + 2cm*)
In my case, I had one 45 cm x 45 cm piece and two, 32cm x 45 cm pieces.
*I am using a seam allowance of 1cm, so I’m essentially just adding that to each side.
For the quilted cover
Decide on the size of your grid and use that to figure out your square pieces’ dimensions. For example, I wanted a 5x5 grid, and 43/5 = 8.6, so my squares would be 10.6cm x 10.6 cm (8.6 + 1cm seam allowances on all sides).
As for quantity, with a 5x5 grid, my Front Piece is made of 25 squares and my two Back Pieces are 15 each, for a total of 55 squares—27 in color A and 28 in color B, see diagram for the checkerboard pattern.

QUILT (skip ahead if making the simple cover)
When you have all your squares cut out, organize them into rows and then start sewing, wrong sides together. Triple check your seam allowance is exactly 1cm, since being off even a little bit will add up!
After sewing into rows (for reference, I had 11), press all seams open with seam allowances to opposite sides. Then, one by one, pin row to adjacent row, wrong sides together. Take your time aligning seams to ensure that crisp four-cornered seam on the front. Sew together and repeat until rows form Front Piece & two Back Pieces, then press open.


HEM OPENING
Press and fold one edge of the Back Piece to the wrong side by the seam allowance twice. Pin in place and then edgestitch. Repeat for the other Back Piece.
SEW TOGETHER
Place Front and Back Pieces, all three right sides together, with outside edges aligned and hemmed edges of the Back Pieces towards the middle. There should be a healthy amount of overlap between the two Back Pieces. For the simple case, the overlap is about 1/3 the full width of the pillow. For my quilted version of the case, it’s exactly one row. Pin together, again doing diligence to align all seams, this time between front and back. Sew one continuous line of stitching 1cm from the outer edge, turning 90 degrees at each corner, to form pillow case!
Trim fabric so that the seam allowance tapers down to about 0.25 cm at each corner. Turn inside out and then carefully insert your pillow into the case! Nap time!

P.S. in the image below, I’ve pried the overlaps open, which is how you get the pillow insert in and out! These pillows hold their shape nicely but I imagine if you have an extra fluffy pillow that’s bulging out here, it could help to add a button & button hole at the center back to keep this overlap closed. I might try this out next time too!


Making my own Wedding Dress
I am writing this in December 2021, exactly one year after officially starting to make my own wedding dress. Richard proposed in July 2020 and in November, we scheduled our wedding for early July 2021 with equal parts optimism and anxiety about what would unfold during the next seven months. So, here we were in December 2020, with our wedding date and venue confirmed (it would be outdoors) when Switzerland went into its second major lockdown, one that would force all non-essential business to close their doors and their employees, including us, to work from home until May.
Before re-discovering sewing as an adult, I wasn’t nearly as interested in fashion. While living in New York (which is synonymous to my pre-sewing years) I wore oversized, all-black clothing predominantly from the men’s section of COS and random sample sales. I found fashion intimidating, shopping exhausting, and online shopping impossible. When I started sewing my own bags (in 2019) and then clothes (2020) I began to see fashion and certain designers in a new light, and my free time became suddenly consumed with learning about the construction of clothes and re-discovering my own aesthetic. It felt like the first time EVER that I could ask myself “what do I want to wear?” because suddenly there were no constraints. My sewing room had no men’s or women’s sections, no size restrictions or associations, and no style, price tag or sustainability goal that seemed too out of reach.
Anyways, all this is to say that prior to getting engaged, I never thought much, if at all, about wedding dresses. I didn’t even know I wanted to wear one, and if I did, I certainly didn’t know what style. I was however, strangely convinced that I wanted to make whatever I wore to my wedding. I don’t know if this was a symptom of my aforementioned newfound fashion passion (again, this was winter of 2020, only a few months after finishing my first handmade dress ever–Birgitta Helmersson’s #zwgatherdress) or if it was a logistical choice; probably both. My other options at the time felt slim: I knew I couldn’t go wedding dress shopping locally since shops in Basel/Zurich would have been closed due to the lockdown. At the time, I didn’t feel comfortable or even excited about traveling home to New York to shop there. I researched businesses that let you rent dresses and others that let you pick several to be shipped to you so you can “shop” from your home. The problem for me with both of those options was Switzerland's super high import tax: so even renting or trying on a dress (or two, or three) could cost me over a thousand Swiss Francs just in VAT since the tax is based on the dresses’ actual value, not the rental or try-on fee. As stressful as making my own dress sounded, it still seemed less stressful and less unpredictable than finding one given the circumstances.
Again, one year has passed since this process began. I’ll describe it chronologically and do my best to include any resources that I found helpful along the way. I promise not to have rose-colored glasses in order to accurately depict my headspace at the time. It’s easy for me to look at photos today and say that making my own dress was so unbelievably satisfying, empowering, etc. which is true BUT it was also very stressful, emotional and time-consuming. I am not an expert by any means, so this is intended to be a journal entry about my experience rather than advice. I would do many things differently given the chance, and I’ll try to be honest about that.

CHOOSING THE PATTERN
November 2020
Long story short, I decided that I would wear a white dress. If you are trying to make this decision yourself, besides thinking about what would make you the most happy, special, comfortable, etc. my recommended listening/reading would be Avery Trufelman’s Wedding Dresses Article of Interest episode and also Jia Tolentino’s essay, I Thee Dread from her book Trick Mirror. I spent about a month casually immersed in photos of weddings and dresses (mostly enabled by just Googling the names of people whose style I look up to + “wedding”) as well as sewing patterns on Etsy. This month-long research phase was super helpful to establish what I liked and what was within the realm of reality for me to make.
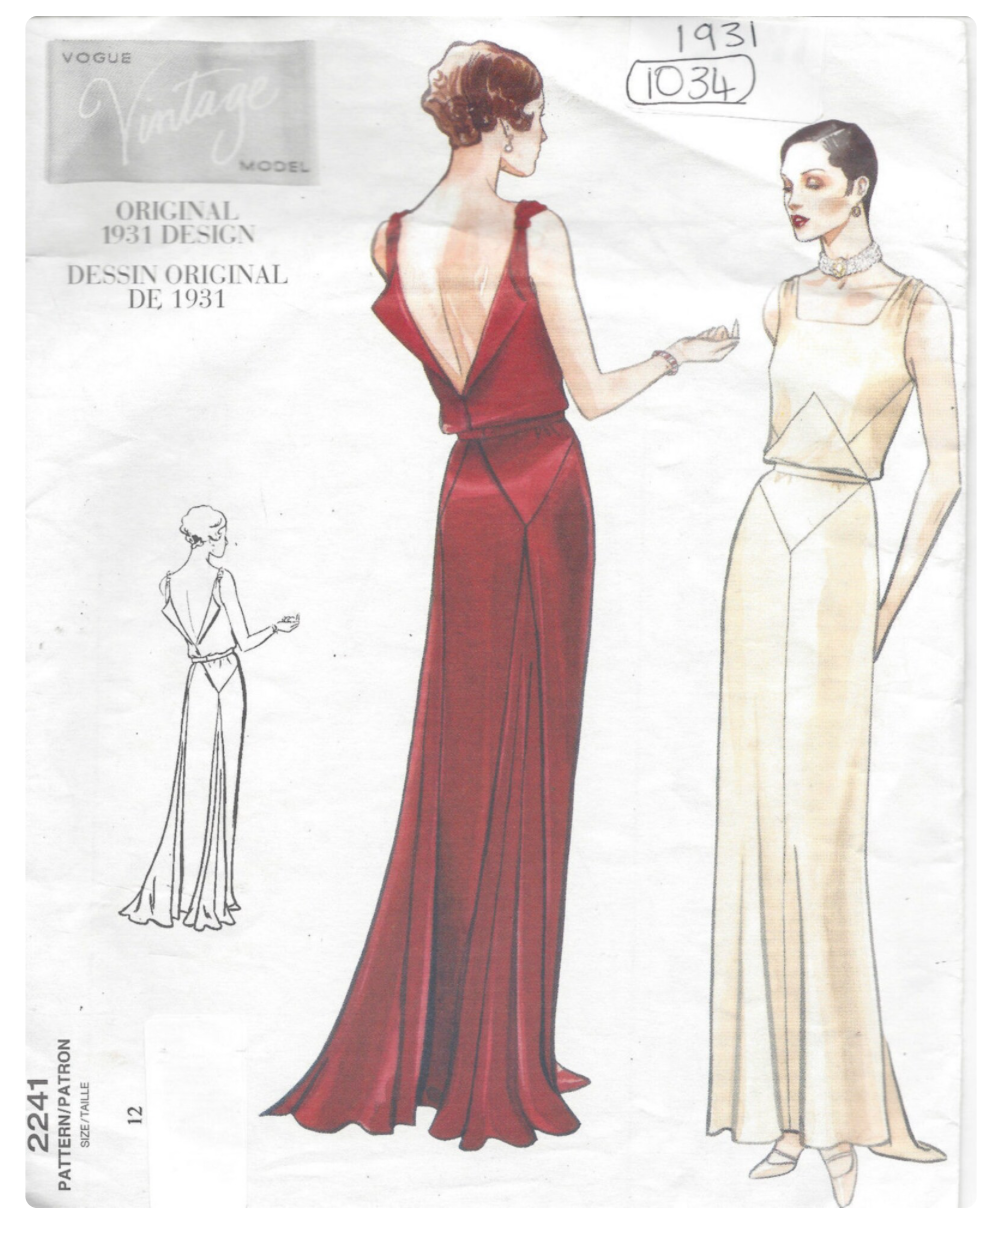
Below were my final contenders for the sewing pattern. Unexpectedly, they date either from the 1930s or 1990s, but I believe there’s a consistent aesthetic to them: simple yet interesting silhouettes, drapey and understated fabric (not voluminous, lacey, embroidered, etc.)


Around this time, I consulted two good friends, Heidi and Steph, who handmade a wedding dress and wore said wedding dress, respectively, about two years earlier. This dress, to me, was a huge success story so their input was invaluable. I had sent a few of these patterns to Heidi, to which she replied Ooh those are fun, I think you’ll be fine! They don’t look like they need too many layers or boning, I think you could do it. At the time, I didn’t know what boning was but I was relieved to hear I wouldn’t be doing it. Anyways, thank you to Heidi for the vote of confidence and also for the numerous resources and pieces of advice, some of which I’ll be recycling in upcoming paragraphs.
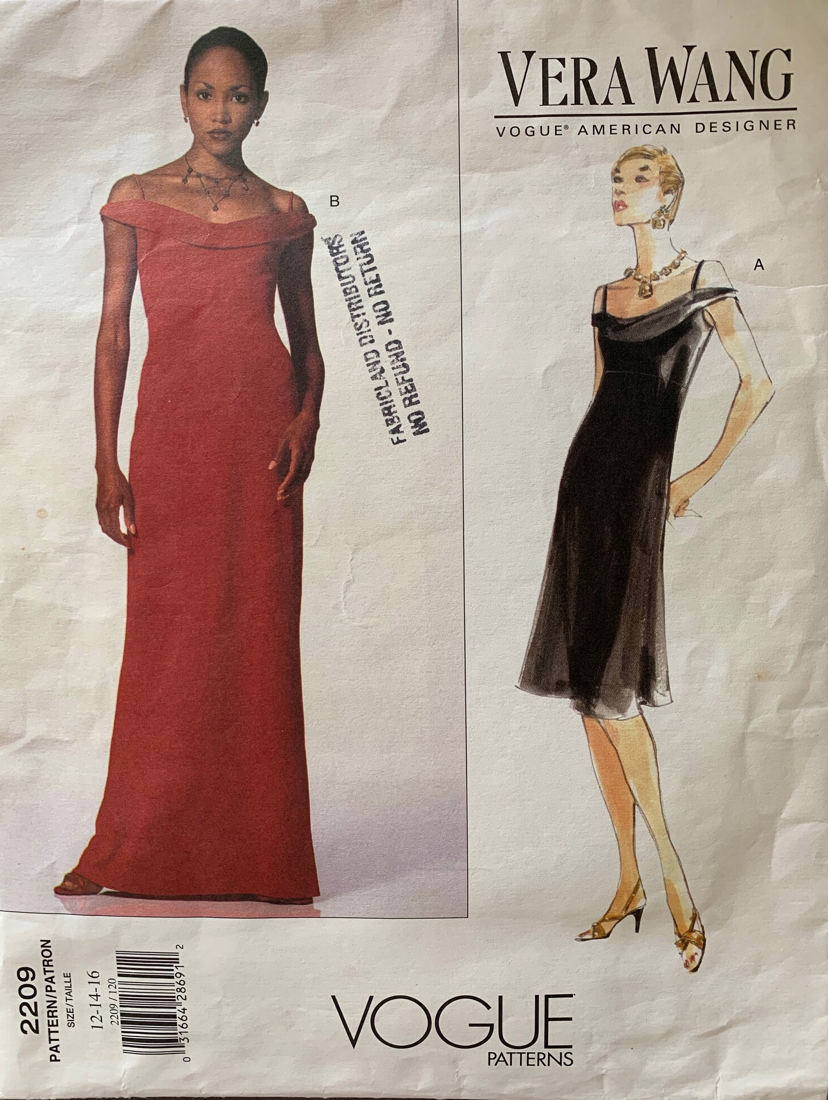
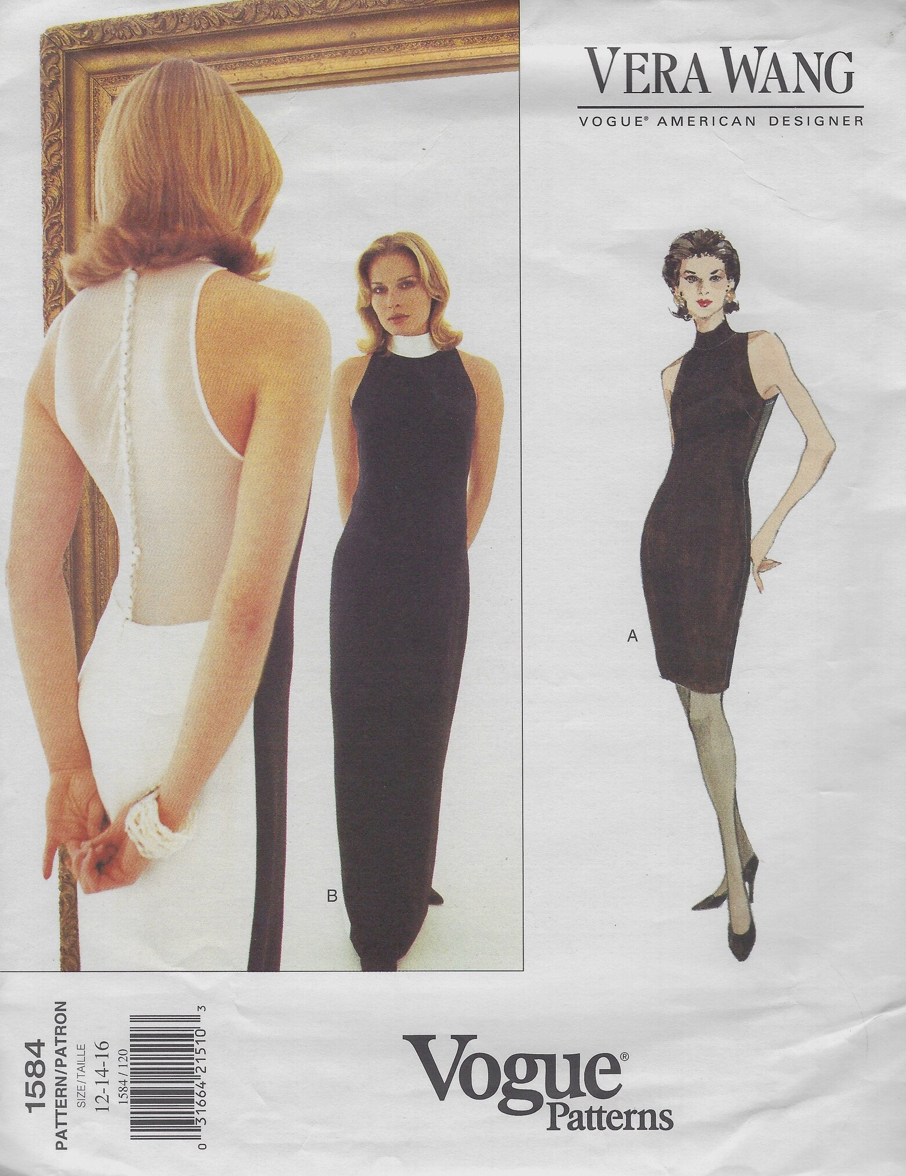
In late November, I made my decision and ordered the Alexander McQueen for Givenchy pattern ($64.75, including shipping): it’s an asymmetrical dress cut on the bias. The image on the left of the cover is from his Spring 1998 runway and the illustration on the right shows the subtle cowl back design, which I was obsessed with. You can visit the Pattern Vault site if you’re curious about McQueen’s stint at Givenchy and other patterns from this collection or Tany et la Mode’s blog to see her process of using the pattern to make a dress. When I was trying to decide between patterns I found it SUPER helpful to scrounge the internet and Instagram using the pattern’s name and/or serial number e.g. #vogue2157 #v2157 since I think illustrations on vintage patterns are often misleading as to how the garment will actually look.
MODIFYING THE PATTERN & TOILING
December 2020
The pattern arrived and it wasn’t in the best shape: it was pre-cut to a size 14 and I needed a size 12. At the time, I think there was an uncut version of the pattern available on etsy for $90, but I was hoping that the size 12 linework was still intact and it was worth saving $30, and for the most part it was. I spent one weekend tracing the original paper pattern using sturdy trace paper and pen, scanning the traced version (I was worried the feeders of the large-format scanner would shred the original pattern’s tissue paper to bits), and then digitally tracing the scan in AutoCAD. Digitizing the pattern is totally optional but since CAD is a software I use regularly in my job as an architect, I was just more comfortable about drafting any alterations to the pattern digitally rather than by hand.
We stayed in Basel for Christmas, so I found the time to make my first toile during our time off. I wanted to get my bearings on the pattern’s construction and fit, so I just used cheap IKEA cotton and didn’t yet make any modifications. As you can see from the photos, the fabric was too stiff to make the cowl in the back but I wasn’t so worried about that. My biggest concern was the neckline, which (I had already assumed from the photos on the pattern and Tany’s blog) wasn’t compatible with my small bust.
I made two more toiles after this one almost entirely devoted to reworking the neckline. The diagram shows the original and revised version of the front pattern piece overlaid. To be completely honest, I was a bit in over my head in this arena, but I googled a fair amount about the slash and spread method to remove volume in order to remove the cowled bust. The only change between my second and third toile was to raise the neckline even more in order to further differentiate the dress’s front and back.


Toile no.1 (neckline pinned in)

Toile no.2

CHOOSING THE FABRIC
January 2021
The pattern recommends making the dress twice: once in a crepe de chine and once more in a novelty sheer as the outer layer. I’ve never owned these fabric types in any clothing, let alone sewn with them, so I began another mini-research phase. For those who might not know, as I didn’t really before sewing, fabrics can be described by their weave type and/or by their fiber content. For example:
My tote bag is 100% cotton. (True–this is describing the fiber content.)
My tote bag is made from canvas. (Also true–this is describing the fabric’s weave.)
I want to buy more cotton canvas to make another bag. (Usually true! And also the most thorough way of describing fabric.)
Fabric weave types typically used in wedding dresses and veils (crepe de chine, satin, taffeta, organza, chiffon, tulle, etc.) historically were made with silk, but it’s not a given. So if you are shopping for wedding dress fabric, or any type of fabric, and you have a preference on both weave and fiber content, make sure you look for both listed in the product description. A fabric that might look like silk, described as “Satin”, could be (and oftentimes is) 100% polyester.
Heidi and Steph bought all of their fabric from Mood, so that’s where I started. You’ll have to forgive me when I say that I’ve never watched Project Runway, but if you have heard of Mood, maybe it’s because of this show. It’s a wholesale-turned-retail fabric store in NYC’s garment district that carries a lot of designer burnout/deadstock fabrics as well as their own label. If you’re curious about fabric types, their website is a good resource. For example, this is the fabric I was honing in on and you can see they have photos of it being worn on the runway and by customers, and they often have YouTube clips showing the fabric being handled so you can see its movement, drape, opacity, etc. If you’re going for something more ornate and are in the market for trimmings, lace, beads, etc. this is a comprehensive guide to the NYC garment district.
Since novelty fabric is typically pricey, I recommend shopping in person if possible. However, most fabric stores are happy to mail you swatches, and if not, maybe you have a very nice, trusted friend or family member that lives near a fabric store that can be your eyes and hands or pick up swatches for you. I ordered 11 swatches of my top fabric contenders from Mood ($26.50, including shipping) after exploring their selection and learning that white fabric comes in dozens of shades e.g. brilliant, antique, pearl, ivory, winter, whisper, tapioca, blush, etc.

February 2021
Ultimately, the swatches were very helpful to see how the fabric responded to light, to feel its texture, to see the subtly different shades against my skin, etc. Due to their small size, however, they’re not so helpful in illustrating the fabric’s drape and it’s a bit hard to tell their opacity. Anyways, I ended up ordering 4 yards of Antique White Silk Crepe de Chine ($103.96 at $25.99/yard) and 4 yards of Antique White Silk Chiffon ($59.96 at $14.99/yard). The pattern called for 3 ⅜ yards of each.
Around this time I also bought two spools of silk “almost white” Gütermann thread ($11.98) after reading that it’s more slippery than polyester/cotton thread, making it less likely to snag or tear the silk fabric. I also liked the idea of leaving a door open to someday dyeing the dress, and silk thread will take on color consistent with the silk fabric.
THE IMPORTANCE OF TAKING BREAKS
March 2021
My weekends and evenings in February and March were largely dedicated to releasing my first sewing pattern, the Zero Waste Wave bag (or ZWWave). I was totally obsessed with it and it felt “bad” to push the dress to the back burner but ultimately, I totally encourage taking breaks. Sewing my dress without occasionally making bags would feel like participating in Nathan’s Hot Dog Eating contest without being able to drink water. I needed these small sewing victories to relax, have fun, boost my confidence, etc. and wash down the anxieties and insecurities that might have been building from sewing the dress. If you are making your own wedding dress, it’s important to realize how draining (both physically and emotionally) it is, and to make sure you’re also taking breaks and taking care of yourself.
SEWING THE DRESS
April 2021
I recommend the following resources when it comes to “couture” sewing projects and working with silk/delicate fabrics:
Blog: Sewing Tips for Specialty Fabrics, Sew4Home
Blog: Sewing with Silk, Made to Sew
Podcast: Love to Sew, Episode 134: Sewing with Delicate Fabrics
Book: Couture Sewing Techniques, Clair Shaeffer
And YouTube! My search history around this time was exhaustive e.g. cutting shifty fabrics, sewing with silk chiffon, rolled hem, etc. Whatever technique you’re curious or scared about is most likely covered widely on YouTube.
I won’t go into too much detail about the actual sewing process because a lot of the information will be unique to my dress design but here are some tips that I hope are broadly applicable:
Invest in rotary scissors and/or a new rotary blade. Prior to this project, I always cut my fabric with scissors but novelty fabrics are usually so delicate and slippery that the simple act of lifting them up off the cutting surface with the blade will cause the fibers to shift, creating a slightly serrated edge.
Set up a good cutting surface. Fabric pieces for wedding dresses are usually quite large, and most of us probably don’t have an expansive and impeccably clean cutting table. I improvised by purchasing three A0-sized museum board/chipboard pieces that I laid on the floor to create a seamless surface that I treated as one large cutting mat. This worked great for me, as I have no pets or children running around and a few yoga blankets/bolsters to pad my knees. If you are cutting fabric up on a table, be careful that parts of the fabric aren’t dangling off the edge as this will warp the entire piece.
Invest in microtex/sharps needles (I found mine after a bit of a runaround at Coop–the generic Swiss grocery store chain–for $7.50). The needle point is super sharp and the needle diameter is quite small (60/8). For comparison, I usually only ever sew with a denim (100/16) needle. I read that it’s also helpful to also get silk/sharp pins. I didn’t and rather always hand-basted pieces together and/or pinned within the seam allowance.
Use scraps of silk to do test sews on your machine. I have a Singer Heavy Duty machine and I worried that it wouldn’t have a gentle-enough touch, but it was fine. I used a small seam length (~1-1.5mm) and low tension. Any tension issues (like a light waving effect) might only be perceivable after sewing for about a foot or longer so I would make sure your tests/scraps are large enough.
Avoid backstitching at the beginning and end of seams–I found that this overloads the fragile fabric with too many holes and thread, causing it to tear. I also always started sewing about 1cm in from the fabric edge while gently pulling on the threads to assure the seam started smoothly. Without doing this, the fabric would sometimes get gobbled down into the machine.
Try a walking foot attachment if you’re still having tension or feeding issues. I wish I had, but couldn’t find one locally that was compatible with my machine.
I would recommend french seams when possible for a clean, and “couture” finish. The pattern only called for them with the novelty shear layer so I followed this advice and did a slightly decorative serrated edge seam finish while making the crepe but would have liked them both to be french seamed in the end.
Always use a pressing cloth, low heat, and no steam/water when ironing silk.
If you make something cut on the bias, hang it up for at least 24 hours before hemming the bottom. Since a fabric has its greatest amount of fluidity and stretch on the bias, gravity will work on it and your dress length will grow (in my case, at least 5cm).
Have a Plan B! Making a wedding dress is no easy feat, especially if you, like me, have no experience with it. I’m lucky to have a supportive mom who cheered me along during the process but who also had kept her wedding dress in storage. If I had a complete sewing fail, I would have happily rocked this 1980s heirloom. Knowing about this back-up plan helped reduce my anxiety.
May 2021
Richard returned to the U.S. in May because his visa needed to be renewed, so I knew I had the whole month to take over the living room and do the majority of the final dress sewing. I should mention that up until this point, I was an open book when it came to the dress. He had seen the pattern and the toiles, but from here on out I wanted it to be a surprise. Luckily, Basel has a few random holidays in May so thanks to days like Christi Himmelfahrt I was able to finish the dress. (Himmelfahrt is one of my favorite German words. Himmel = sky/heaven, Fahrt = trip. In the U.S. I think Christi Himmelfahrt is called Ascension Day.) I love how each layer of the dress is only made from six pieces (two pieces for the front, two for the back and two straps) which you can see below.

My makeshift cutting surface and four pattern pieces.

First layer of the dress done! Now just needed to repeat it all (with french seams) with the chiffon fabric…
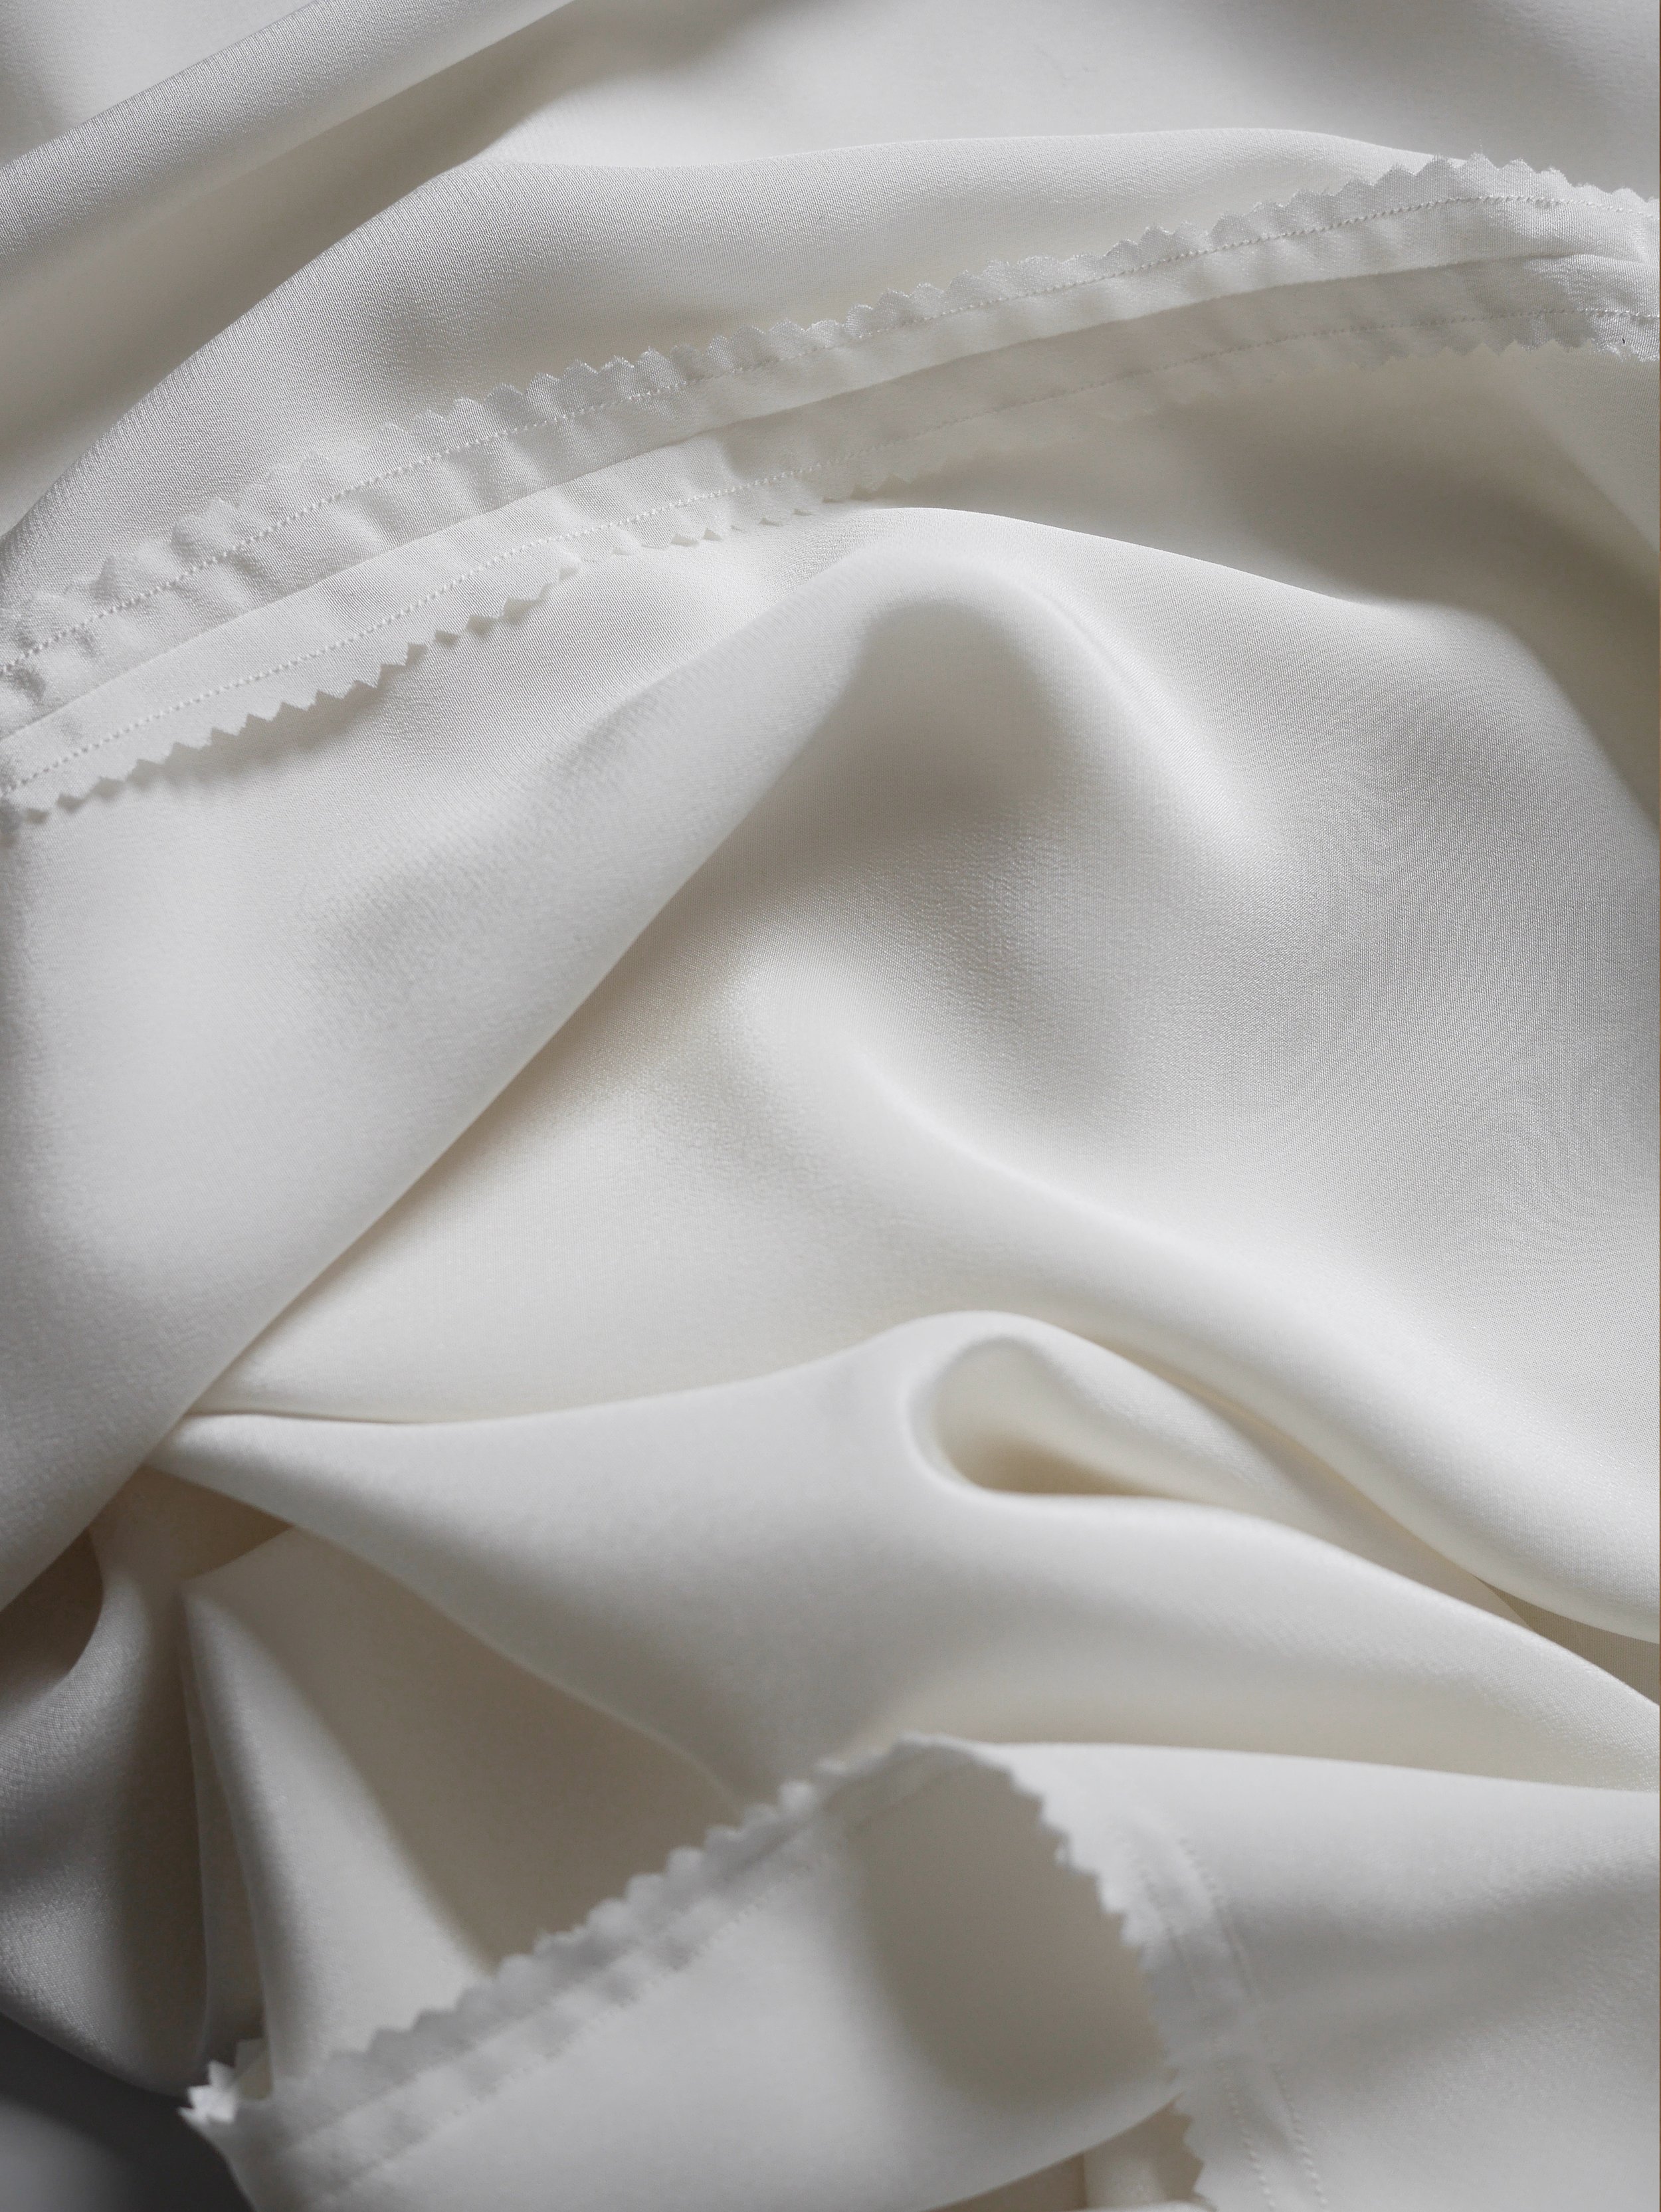
Detail of the seam finishing on the crepe de chine.

I altered the pattern for the second layer so it was about 2”/5cm longer which you see at the hem.

Detail of hand-rolled hem at the neckline and straps.

The chiffon hangs even lower than expected since it expands so much along the bias, but I liked this!

Back view of the dress, where the cowled design is more visible.
June 2021
I ended up having almost one meter left of both fabrics so I used the chiffon remnant to make a diamond shaped veil. In the end the dress was almost completely zero waste since every remnant ended up getting used as practice swatches or as ironing clothes! I finished the entire edge of the veil the same way I hemmed the dress, using this method. The icing on the cake was hand-stitching pearl beads on to it. This is largely invisible in every photo and I don’t know if it was worth the hours and hours of work but it did keep me busy on my totally empty NYC to Zurich flight—on which, by the way, I was randomly selected for a thorough drug check and acted SUPER suspicious when I squealed “please don’t go through that” when they came upon my box containing my dress. Luckily, they were very understandingand their gloves were clean.


SUMMARY
Thank you for making this far in my hopefully not-too-rambly recounting of the process. Although I sprinkled a lot of information throughout the previous paragraphs, here is a consolidated list of the supplies, tools, and materials I needed to make the dress:
Already Owned
Sewing machine
Bobbins
Hand sewing needle
Cutting mat
Trace paper
Scissors
Ruler
Tape measureMuslin/cotton fabric for toiling
Iron
Ironing board
Purchased
Sewing Pattern
Fabric sample swatches
Silk fabrics for final dress
Silk remnant to use as a protective ironing cloth
Silk thread
Microtex (Sharp) needles
Rotary Cutter
Pearl beads
Total spent on the above: $325** (including shipping and duties)
**Disclaimer to this figure: it would be misleading to say that the dress cost me $325 because this number doesn't take my labor (100+ hours), the expenses of the materials involved in creating toiles/mock-ups, and the cost of all the equipment I already own that made the dress possible.
If by any chance, you are wondering about any other aspects of the ensemble, I am happy to share as I would recommend all of them wholeheartedly:
Shoes: Alohas. This was the first thing I’ve bought off an Instagram ad and I have no regrets. They were super comfortable and I actually never, ever wear heels.
Duster/Dress: Ilana Kohn, purchased at a sample sale (oh how I’ve missed you!) in Brooklyn, where I coincidentally met the lovely Lydia @the_swiss_sewing_machine in line.
Hair clip/veil holder: Sylvain le Hen via Rennes. (Both this and the Ilana Kohn dress were a bit of a spurge but purchased on the premise that they would be worn consistently outside the context of our wedding, which I’m happy to report is true!)
Dream bouquet: Fox Fodder Farm (thank you Riley!)
Richard’s tie: Seigo Neckware, who is quoted in this NYTime’s article saying “each tie is our baby” :,,)


If I were to do it all over again, (which I surely won’t, but if…) I think I would make two major changes: the first being to give myself more time. From the time the pattern arrived to the time I was traveling home to the U.S. was five months–and during these months, I was working full-time (albeit at home; I’d occasionally squeeze in sewing during lunch breaks) as well as planning all the other wedding-related things with Richard. The second major change would be to the dress’s base layer fabric choice. Although the pattern calls for crepe de chine and Mood claims this particular fabric is opaque, it sewed up more translucent and lightweight than expected. I do love how my dress turned out, but the translucent aspect was a real problem. I spent much of June (aka, one month before the wedding) on a mad hunt for the appropriate undergarments and found this impossible, so making trips to my parent’s apartment to use their sewing machine and hack some Spanx became a whole separate project in the 11th hour. We also got lucky and a heat wave that was blowing through the east coast broke days before our wedding, so we had an unseasonably comfortable 70°F (21°C) day. In retrospect, it would have been a disaster, (in a horrible, wet t-shirt kind of way) if it had still been 95°F (35°C)+ degrees. Anyways, if you’re planning a summer or outdoor wedding, I would let yourself be a little bit less blindly optimistic than I was so you’re more prepared for worst-case scenarios. Aside from the opacity problem, the crepe fabric was also slightly more lightweight than hoped, and revisiting photos of the toiles led me to miss the structure and volume in the asymmetric gown part of the dress. Perhaps, if I ever remake this pattern for a special occasion, I’ll use a more mid-weight fabric, and hopefully actually be able to shop for it in person!
All this is to say, the dress wasn’t technically perfect, but my memory of the day we got married is, and the dress was just one aspect of that. I’m a very self-critical person so it was easy for me to notice the parts of the dress I would improve upon, but ultimately I was so comfortable and happy wearing it. It felt “me” in a very special, custom-made way.
Thanks again for reading and I hope you found some helpful resources or at least some assurances if you’re choosing to make your own dress. Try to remember that a wedding isn’t about the dress but about your love and how love brings people together! I would often remind myself of this when the pressure was creeping up on me. It was such an empowering learning experience (as I suppose most sewing projects are) but exponentially so, due to the considerable technical and emotional effort required. Good luck; you can do it!
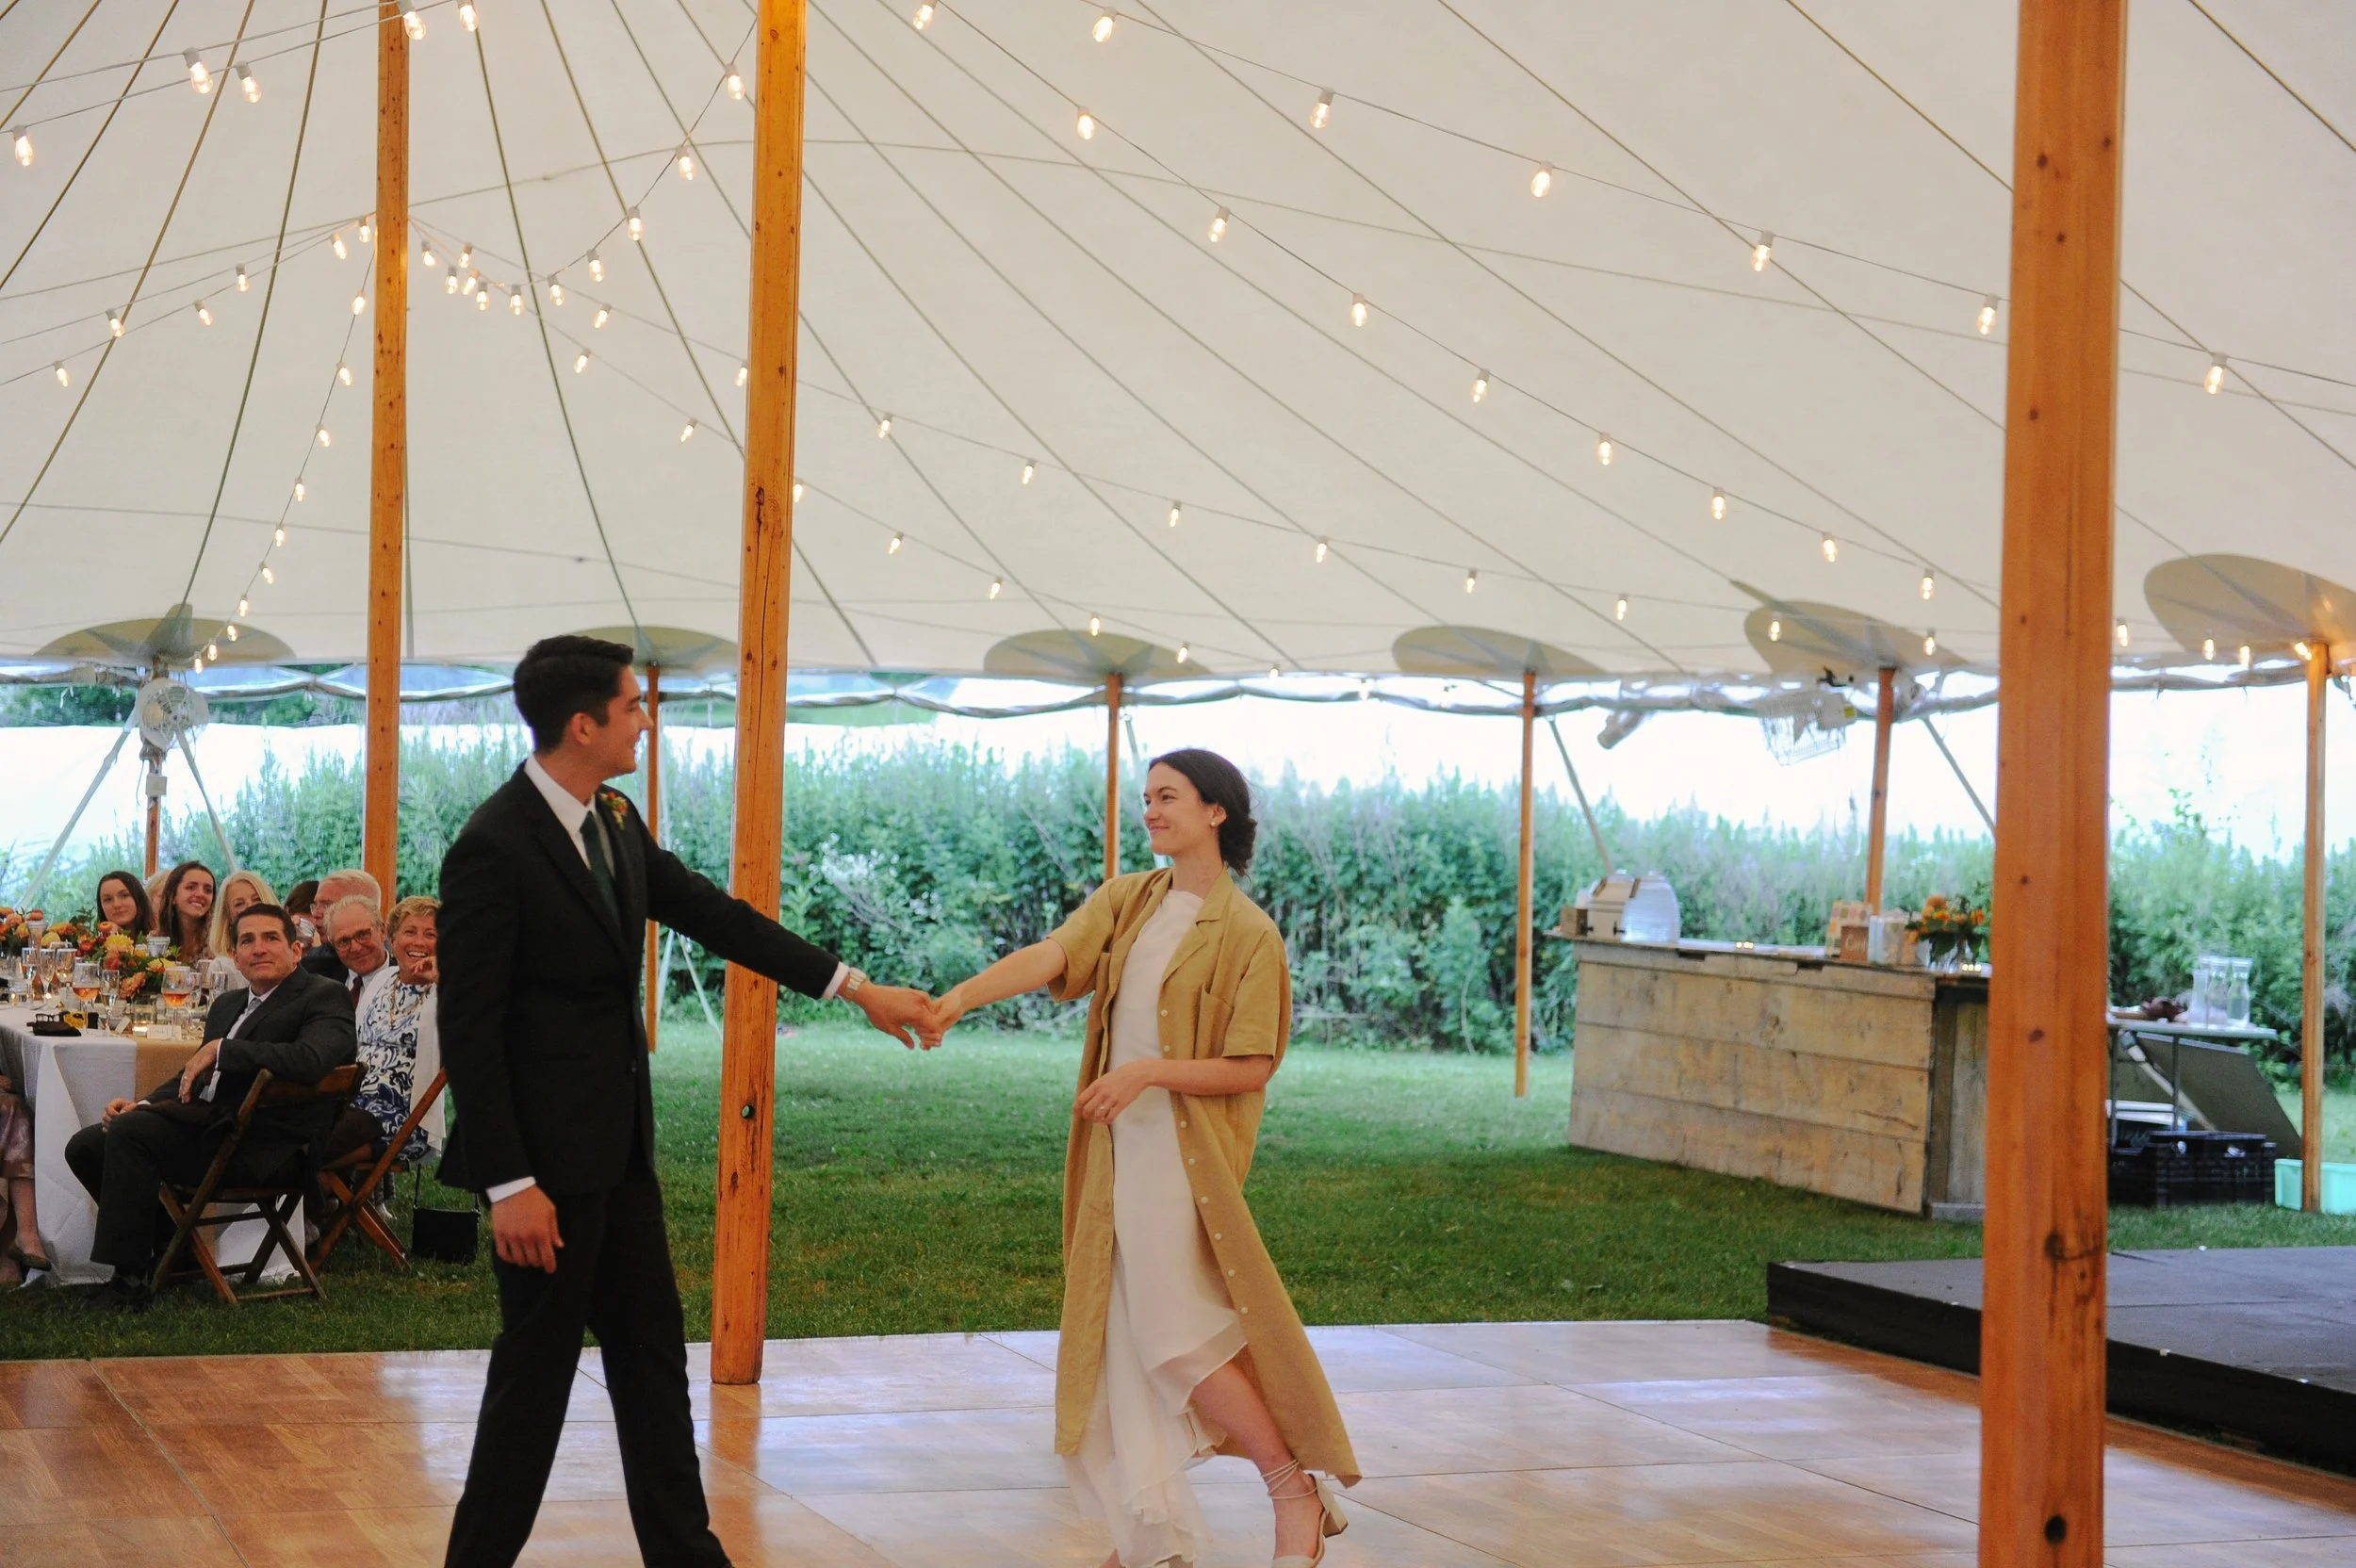
Lastly, thank you to our good friend Andrew Fu for the amazing wedding photos!

#ZWWave Hack: lined & compatible with one-sided fabrics
The zero waste wave bag pattern (zwwave) is designed to be unlined and for fabrics that are (more or less) the same front and back e.g. cotton canvas, bull denim, twills, etc. However, by just duplicating a couple steps with two additional pieces of fabric, you can use the pattern to make a fully-lined bag that works with any type of fabric, all while staying zero-waste. Let’s go!

Take the fabric rectangle that’s remaining after cutting out the two strap pieces; cut a second rectangle identical to this one.

When cutting out your body pieces with the pattern, make sure to “mirror” the wave the second time e.g. trace the pattern on to the “wrong side” of the fabric. The result of this should be the four body pieces as shown.
The next steps aren’t unique to this hack but I wanted to take this time to let you know some tricks that I usually used when making my zwwaves.
(If you aren’t interested in making the circular strap detail and want to stick to the more beginner-friendly rectangular strap detail, feel free to skip ahead!)
Trick no. 1: Sourcing second-hand leather
I recommend finding a local cobbler or a small business that might work with leather and chances are, they have offcuts/scraps they would be happy to give away or sell at a low price. This teeny tiny offcut was going to be thrown away by a cobbler! Other options are thrifting an old belt or using some bag that might be falling apart.
Trick no. 2: Sewing leather
I NEVER use the foot pedal when working with leather; partially because I don’t think my machine could handle it but also because these circles are so small that I don’t think I could get a clean result doing this. I 100% “hand-crank” it (sewing manually with the hand wheel) onto the bag body—it might take an extra minute to do each one but it’s totally worth it.


Trick no. 3: Finishing
Instead of back-stitching, I use a needle to bring the thread ends to the back and then tie them into a knot to secure. This keeps the detail from the front of the bag super clean :)


Steps 3-4 in the pattern remain unchanged except for the fact that you have to duplicate each step for the two body pieces without the straps that will form the bag’s lining.


Slip the lining (right-side out) into the bag (inside-out). Wrong sides together, fold over the top fabric edges towards the lining and pin generously. Take your time on this top curved, seam! It’s the last step before turning inside-out and using your fully-lined zero waste wave bag <3 <3


As always, I am available for answering any questions you may have. I love this pattern hack and its resulting bag, and hope you do too!