
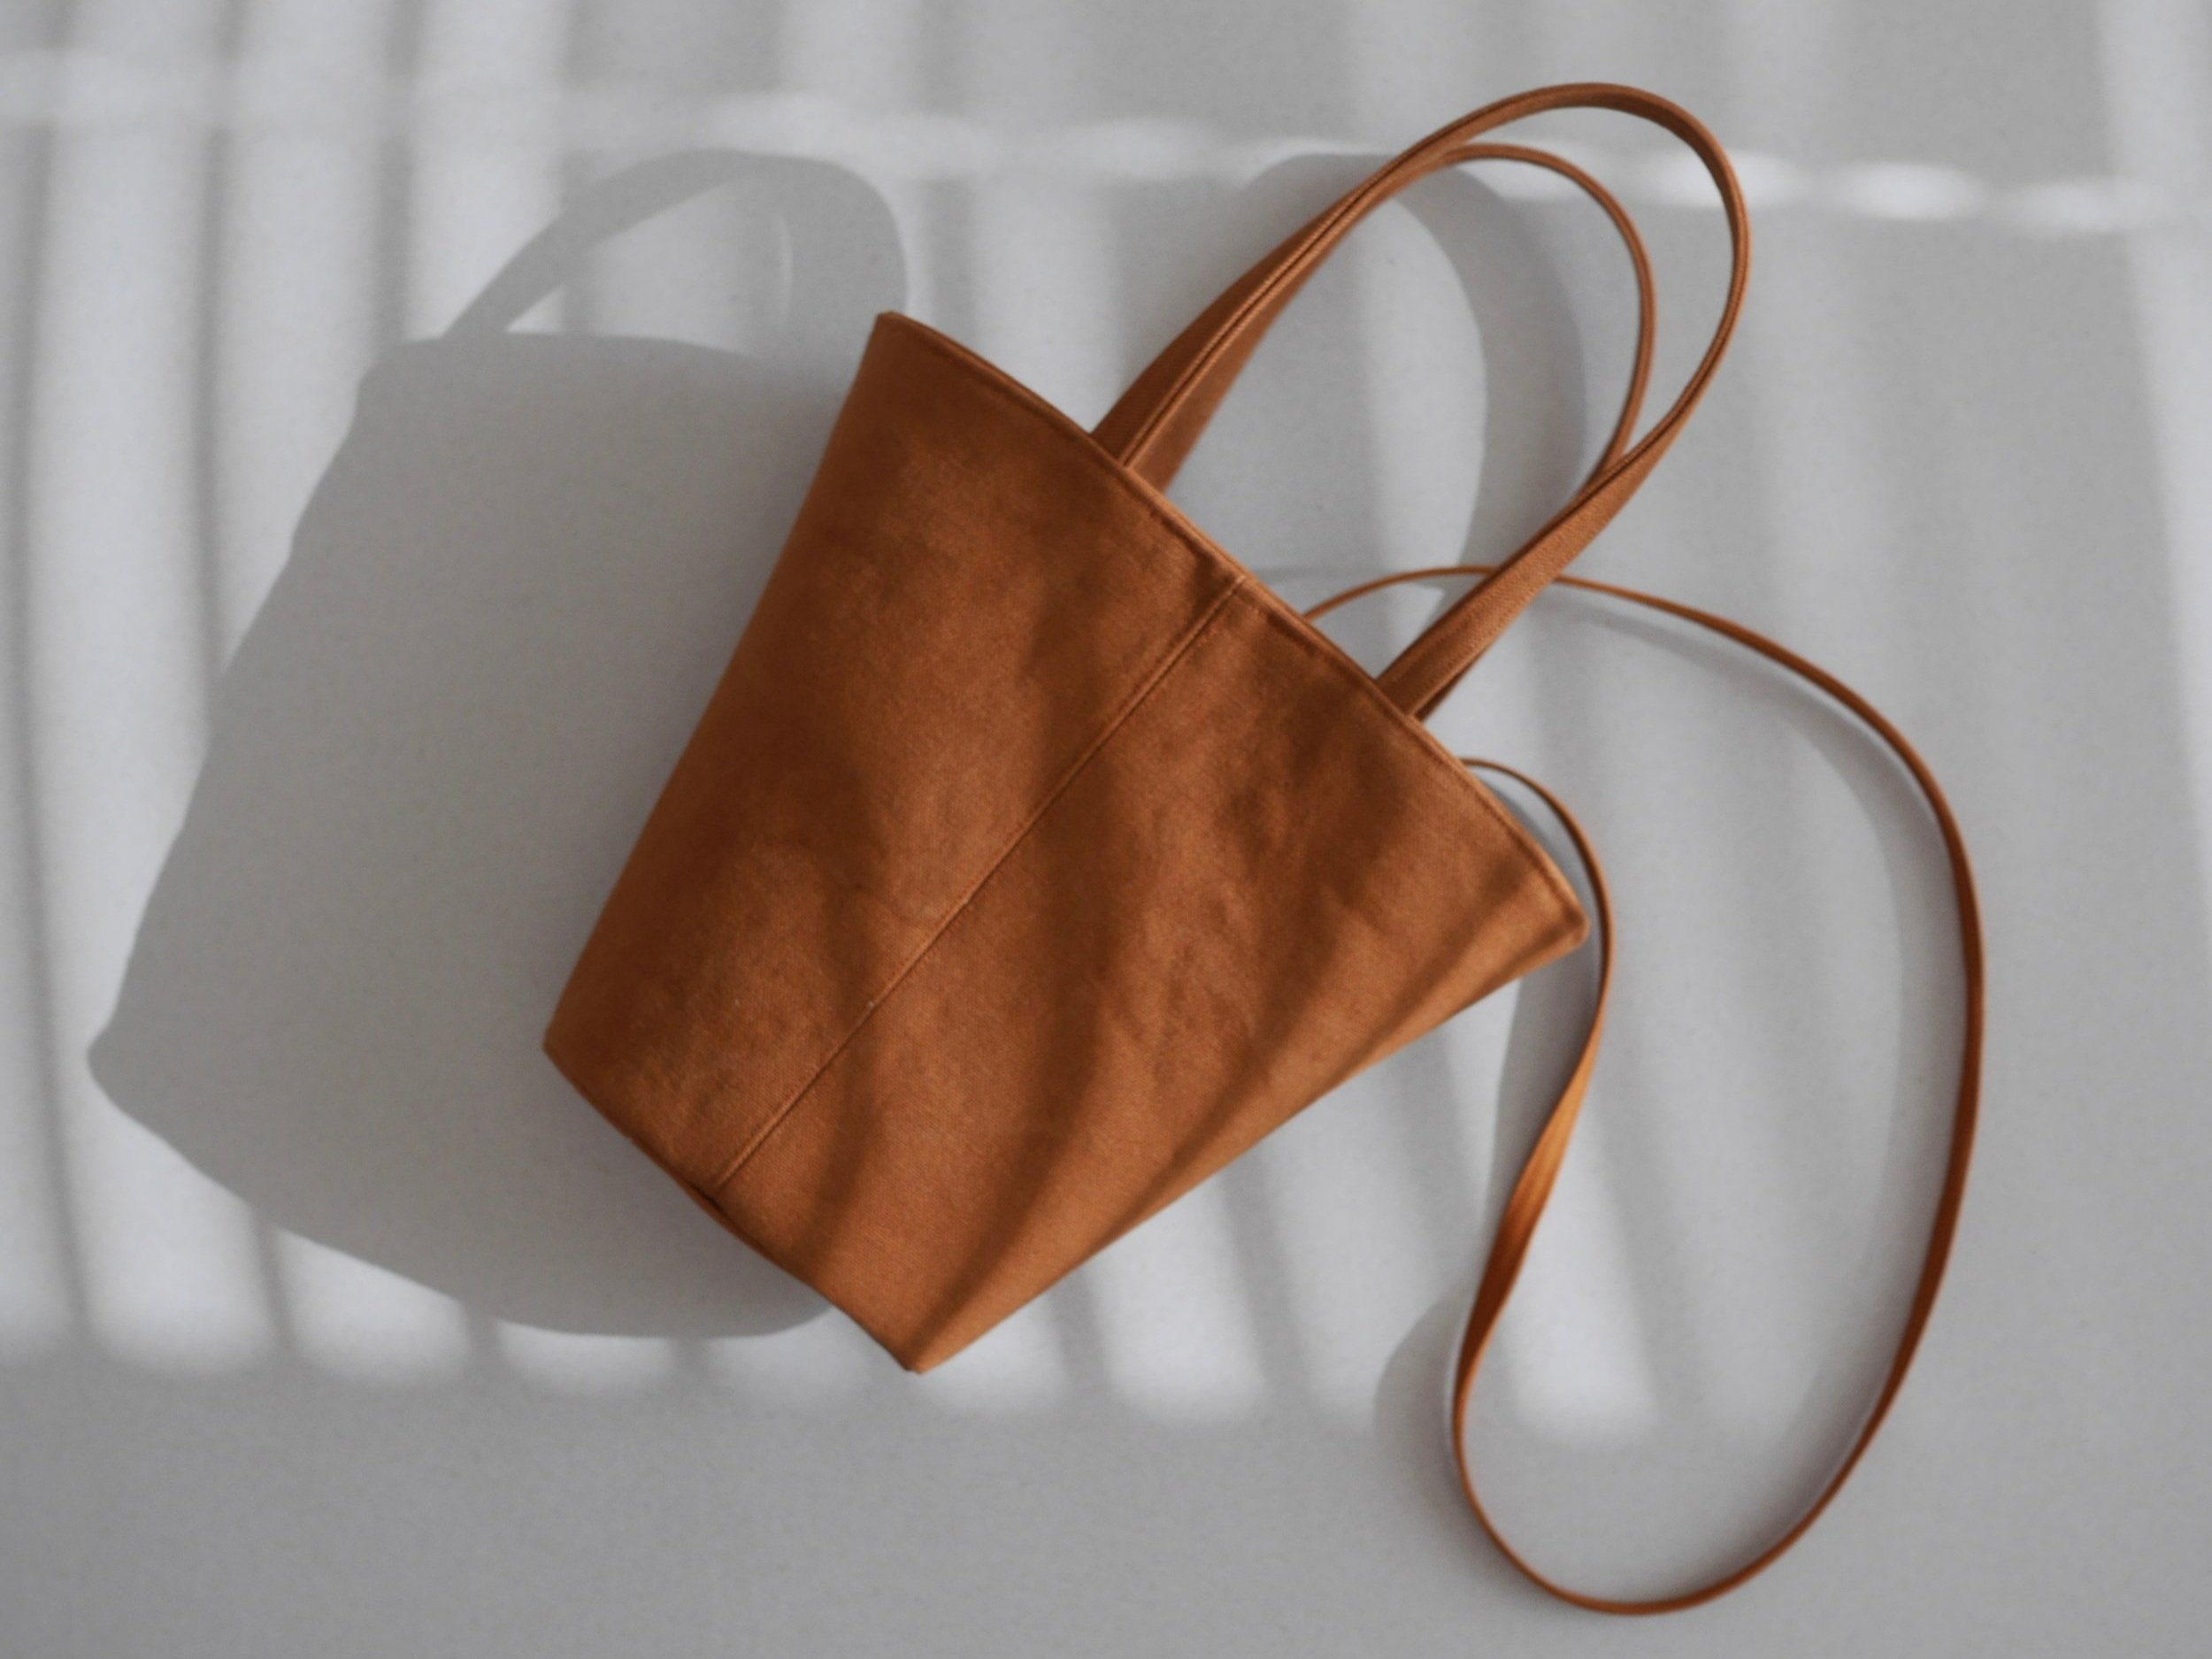
Half-scale ZWish
My latest bag is a result of three different modifications to the original #zwishtote pattern: it’s scaled down 50%, has an added facing, and has an added detachable long strap. For the sake of an easier read (fingers crossed!) I’ll explain each separately rather than conflate the three.
Part 1: How to scale down (or up)
Scaling the pattern is a surprisingly easy adjustment! It affects the fabric requirements, the cutting layout dimensions, the seam allowances, and the scale at which the one-page pattern is printed. Since I'm making a half-scale bag, 50% or 0.5 is my magic number:
Original fabric requirements x 0.5 → New fabric requirements
Original cutting layout dimensions x 0.5 → New cutting layout dimensions
Original seam allowance (3/8” or 1cm) x 0.5 → New SA (3/16” or 0.5cm)
Original pattern pieces (print at 100%) x 0.5 → Print at 50%
Sewing instructions → Remain the same!
A 75%, 125%, or even 150% scale version would work well too! I don’t recommend going smaller than 50% since the seam allowances become too small. Before finalizing the modified cutting layout and cutting the fabric, I considering how the modified bag will fit. The original straps are ~25” (65cm) long and designed to fit over-the-shoulder. A half-scale version will have straps half as wide and half as long; perfect for a cute hand-held bag. (Conversely, a scaled-up version will have wider and longer straps than the original, so shortening the straps may be appropriate to ensure the bag doesn’t hang too low when worn!) I wanted a half-scale cutie that could still be a shoulder or crossbody bag so I considered:
Keeping the straps half as wide—slender and proportionate to the bag—but lengthening them so they’re at least as long as the pattern’s original or
Keeping the half-scale straps and adding an additional long strap.
I ultimately decided on the latter option. Part 3 will go into detail about this additional strap. This adjustment (and probably any strap length adjustment) will mean deviating from a zero/zero-ish waste pattern layout, but that’s A-OK in my book, especially if it means the bag will get more wear!

Changing the scale of the bag didn’t affect any of the sewing instructions; other than adjusting the seam allowances or any dimensioned instructions. I ended up handstitching the bottom, oval piece to the bag (steps 6-7…tedious, I know) since the pieces were too small to maneuver through my machine. For the same reason, I chose to omit the topstitching on the two side seams (step 3-4) but I could have handstitched these too if I was in the mood for extra tedium (I was not).

P.S. I’m using 475gsm canvas self fabric—it’s the best—and 210 gsm lining fabric. Plus, two karabiners, two 16mm diameter d-rings, and a 14.5mm diameter magnetic closure.
Part 2 — Adding a Facing
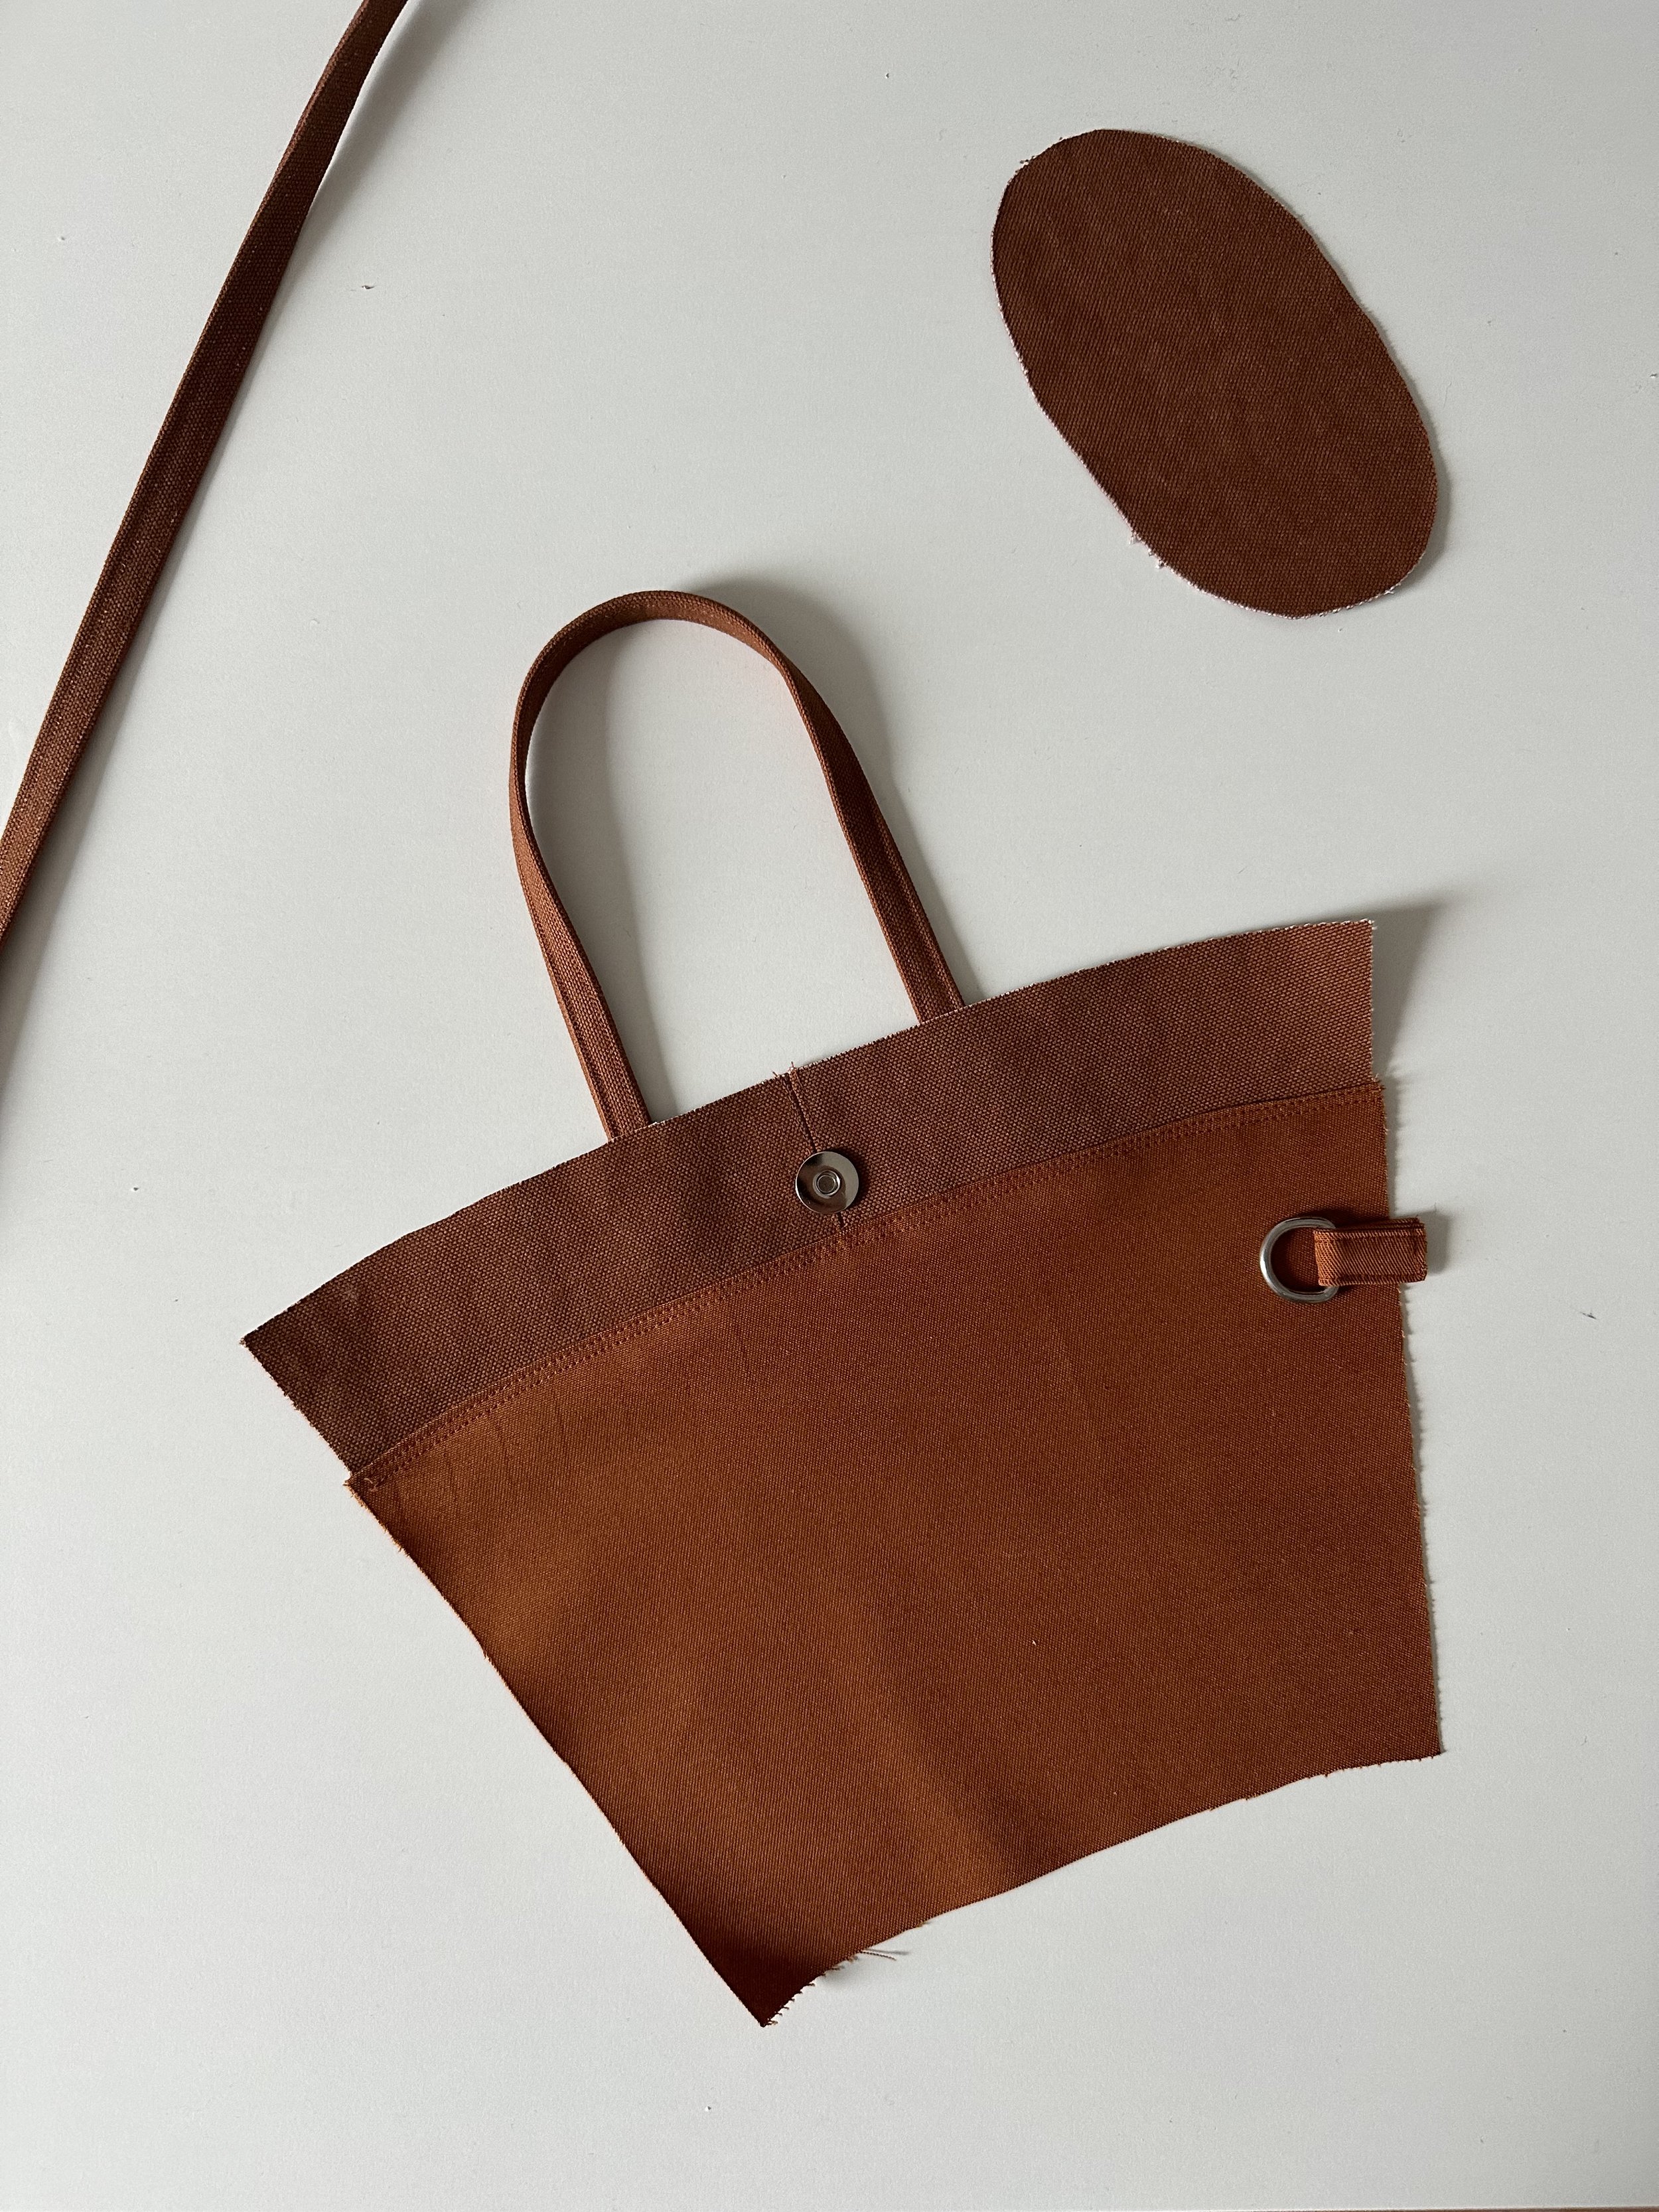
An interior facing gives an extra professional detail to the bag. Since the facing is in the bag’s self fabric, adding one ensures the lining fabric is concealed from the outside. This is helpful if your lining fabric is very distinct from your lining fabric. I drew the half-scale cutting layouts of the self and lining fabric onto paper and determined that the facing should be 1 ¾” (4.5cm) deep (or 3 ½” / 9cm for the original) so the magnetic closure is centered. I drew this measurement, plus a ⅜” (1cm) seam allowance down from the top of each bag piece. These pieces will be the facings. I then drew this measurement again, minus a ⅜” (1cm) seam allowance down from the top of each lining piece. These pieces will be the new, shorter lining. This ¾” (2cm) overlap is necessary since this will become the seam between the facing and the lining. I put the facing and lining pieces away until finishing step 13 of the pattern. Then, I sewed the four facing pieces into two (at the CF & CB) and topstitched on either side of the seam—essentially step 13 & 15 of the pattern but with modified seam allowances. I also then topstitched the CB seam of the lining piece (H/J). Then, I sewed the top of each lining piece to the bottom of each facing piece, pressed the seam allowance down to the bottom, and did a double topstitch. I skipped ahead to step 21 and attached the magnetic closure to each piece. I placed it right above/as close as I could to the facing/lining seam. All other sewing steps remain unaffected unless adding a detachable strap, explained below.

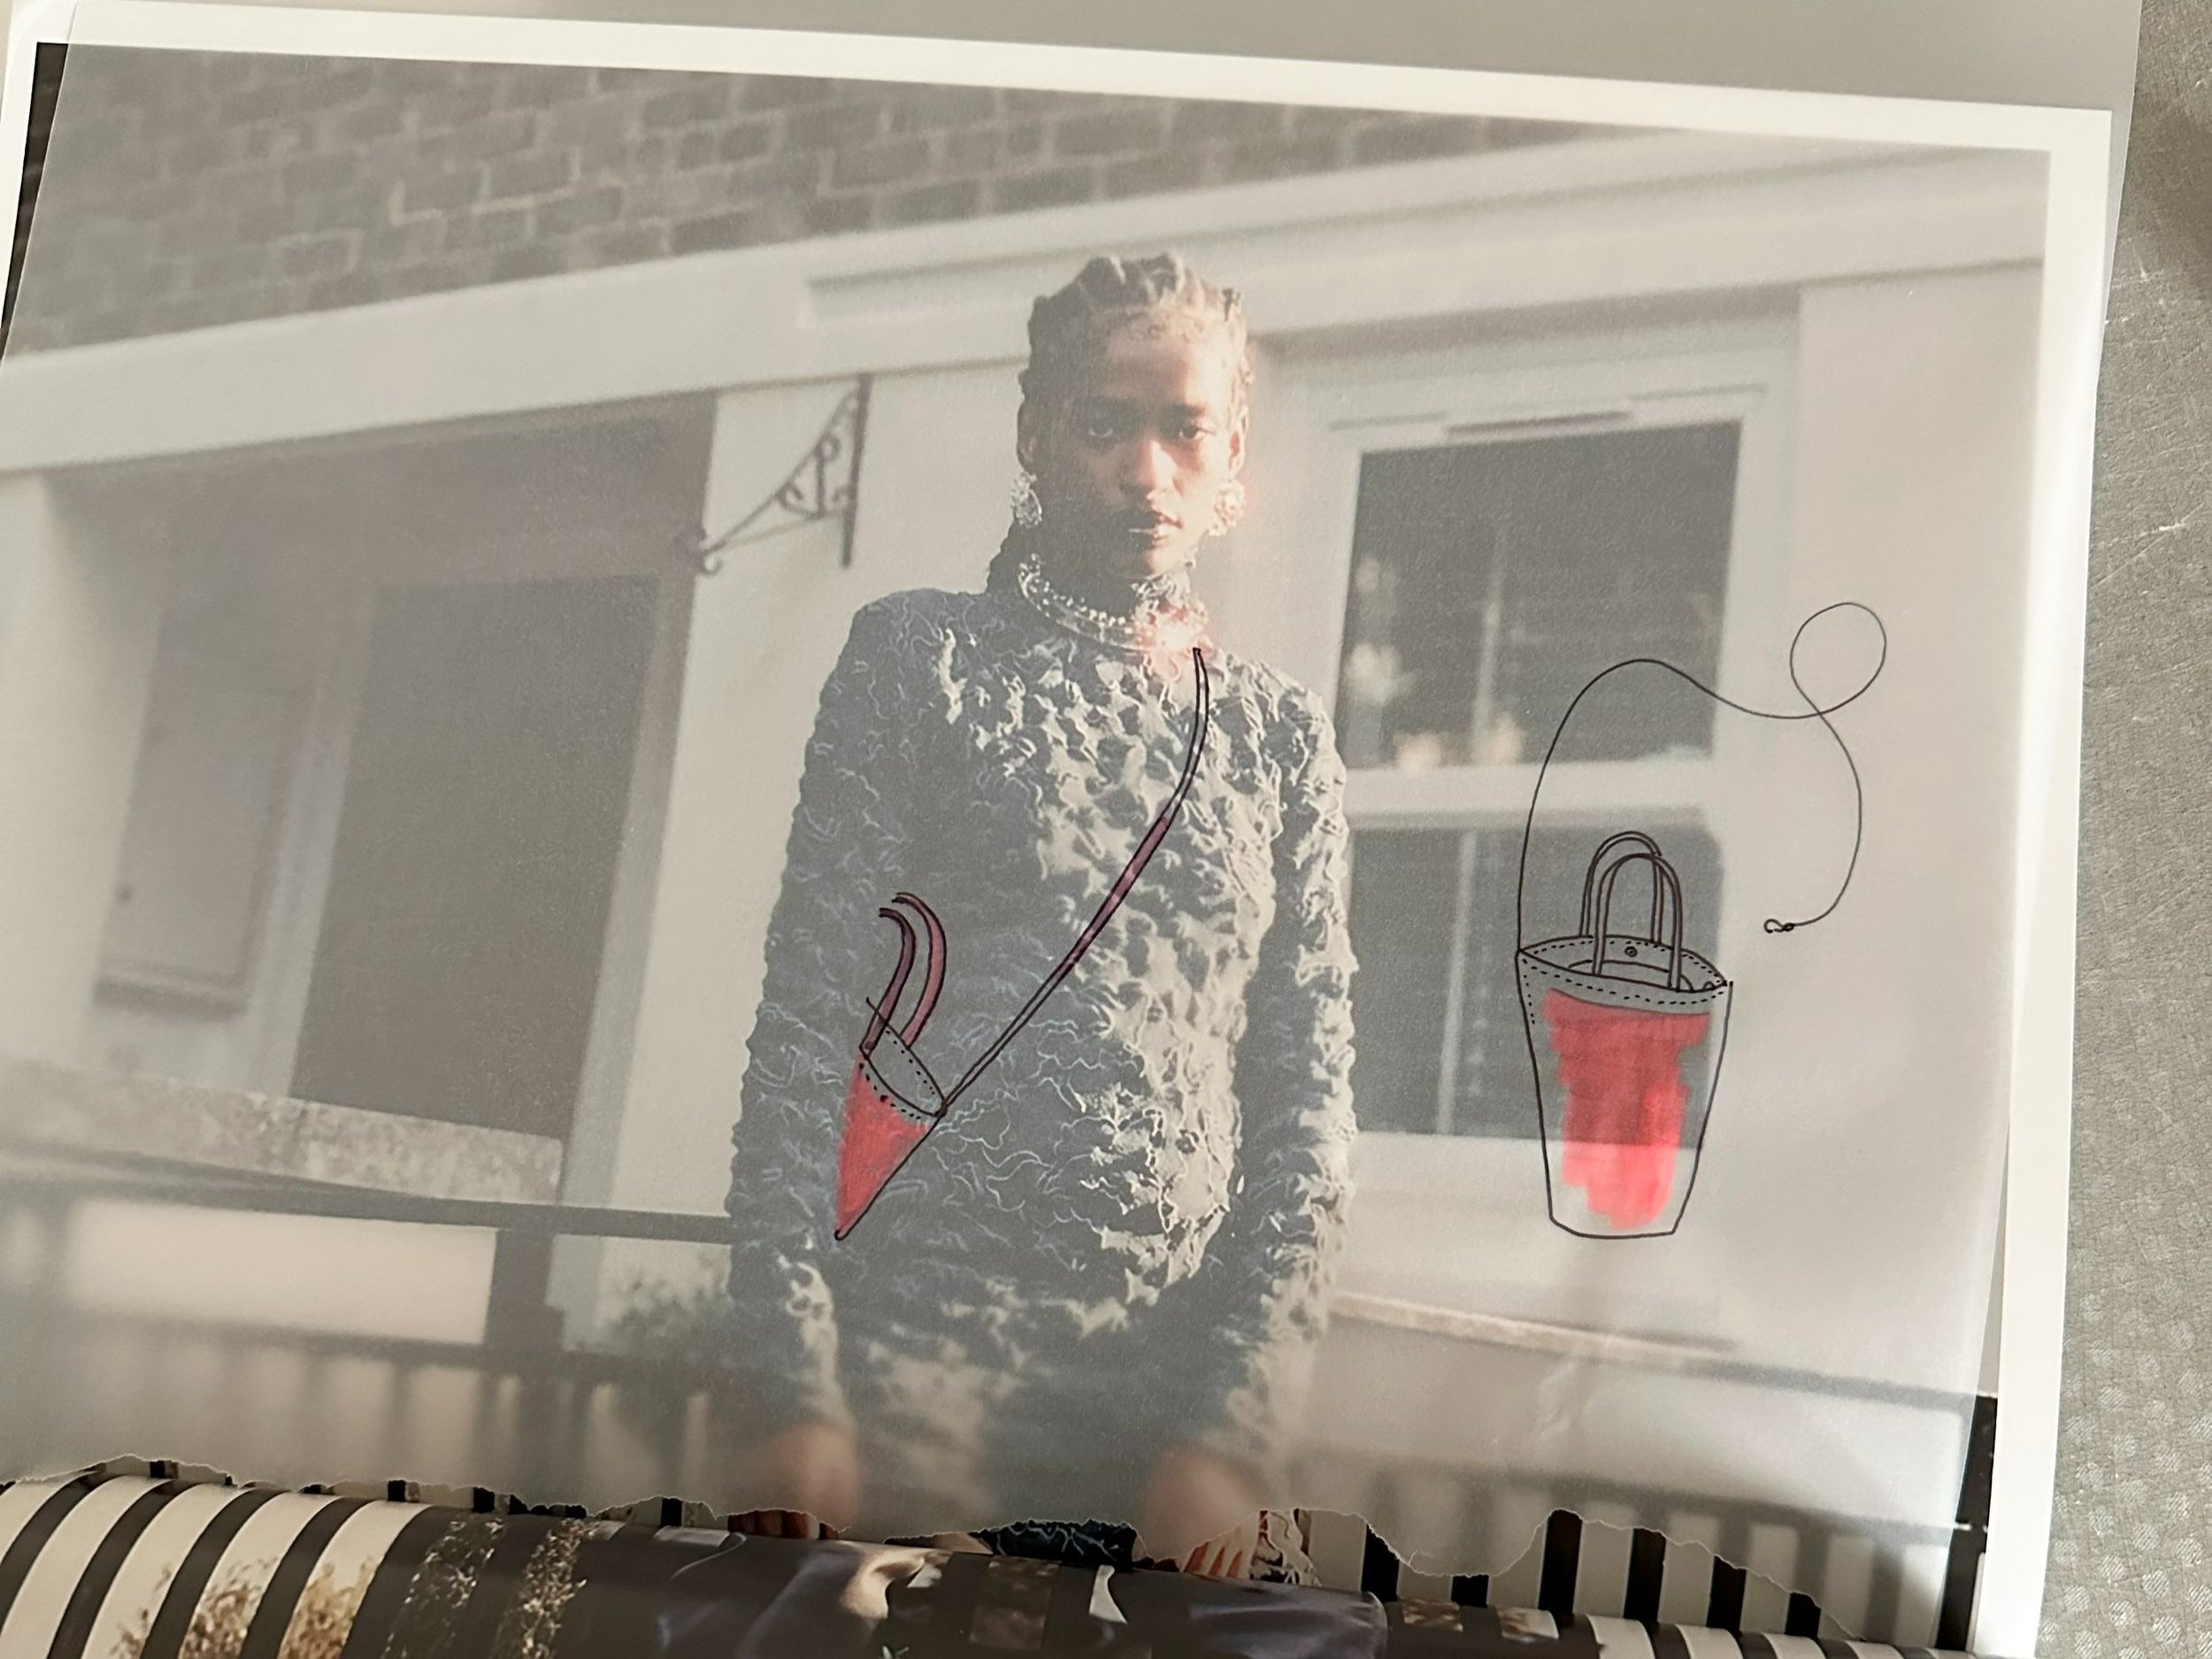
Part 3 - Adding a Detachable Strap
An additional strap is a useful modification if you’re scaling the bag pattern down, and want to have the option of still wearing it over-the-shoulder or cross-body. The original zwish bag pattern has an optional interior key ring, which is integrated into the bag’s interior side seam. For this modification, I essentially doubled this detail so the long strap has these two rings to clip into.

I used a soft measuring tape and decided that the perfect crossbody strap length would be on ~45” (114cm). The strap clips into the bag below the top hem, so this measurement factored that in by adding a tiny bit of length. The full length of my lining fabric was 47” (120cm) so it was perfect to become the strap plus the two ring loop pieces at 1 ⅛” (3cm) long each. I cut a 1 ½” (4cm) strip from the full length and then sewed the long strap as step 8 instructed. Then, I cut the two loop pieces from it. (If your fabric piece isn’t long enough, cut and sew the three pieces separately.)
I placed the long strap aside and followed the pattern’s original instructions for key ring “M” at step 10 to make the strap loop pieces into loop with their respective rings. (Keep in mind these loop pieces are much shorter than “M” in the diagrams—they’re only about ⅜” (1cm) long once sewn in.) For step 12, I baste stitched them both to lining piece “I”. I also adjusted their placement a bit, ignoring the pattern’s measurement and rather placing them just below the seam between the facing and the lining. The first loop is secured to the bag as instructed in step 14. The second one (not pictured) will be sewn in step 16. The gap had to shift down to do this: it wasn’t centered but a few centimeters shy from the bottom seam.
All remaining sewing steps are unaffected by the modifications! Just the long strap needs finishing: I added a zig-zag stitch (~width 4, length 1) to the two short edges, then pressed each edge up ½” (1.5cm). This folding is where the karabiners go, and after sliding those on, I refolded and secured each end with a box stitch. I then clipped each karabiner onto the interior rings because I was in a crossbody mood! Otherwise, I would have rolled the strap up and put it in the little zwish pocket. Because I have options!


